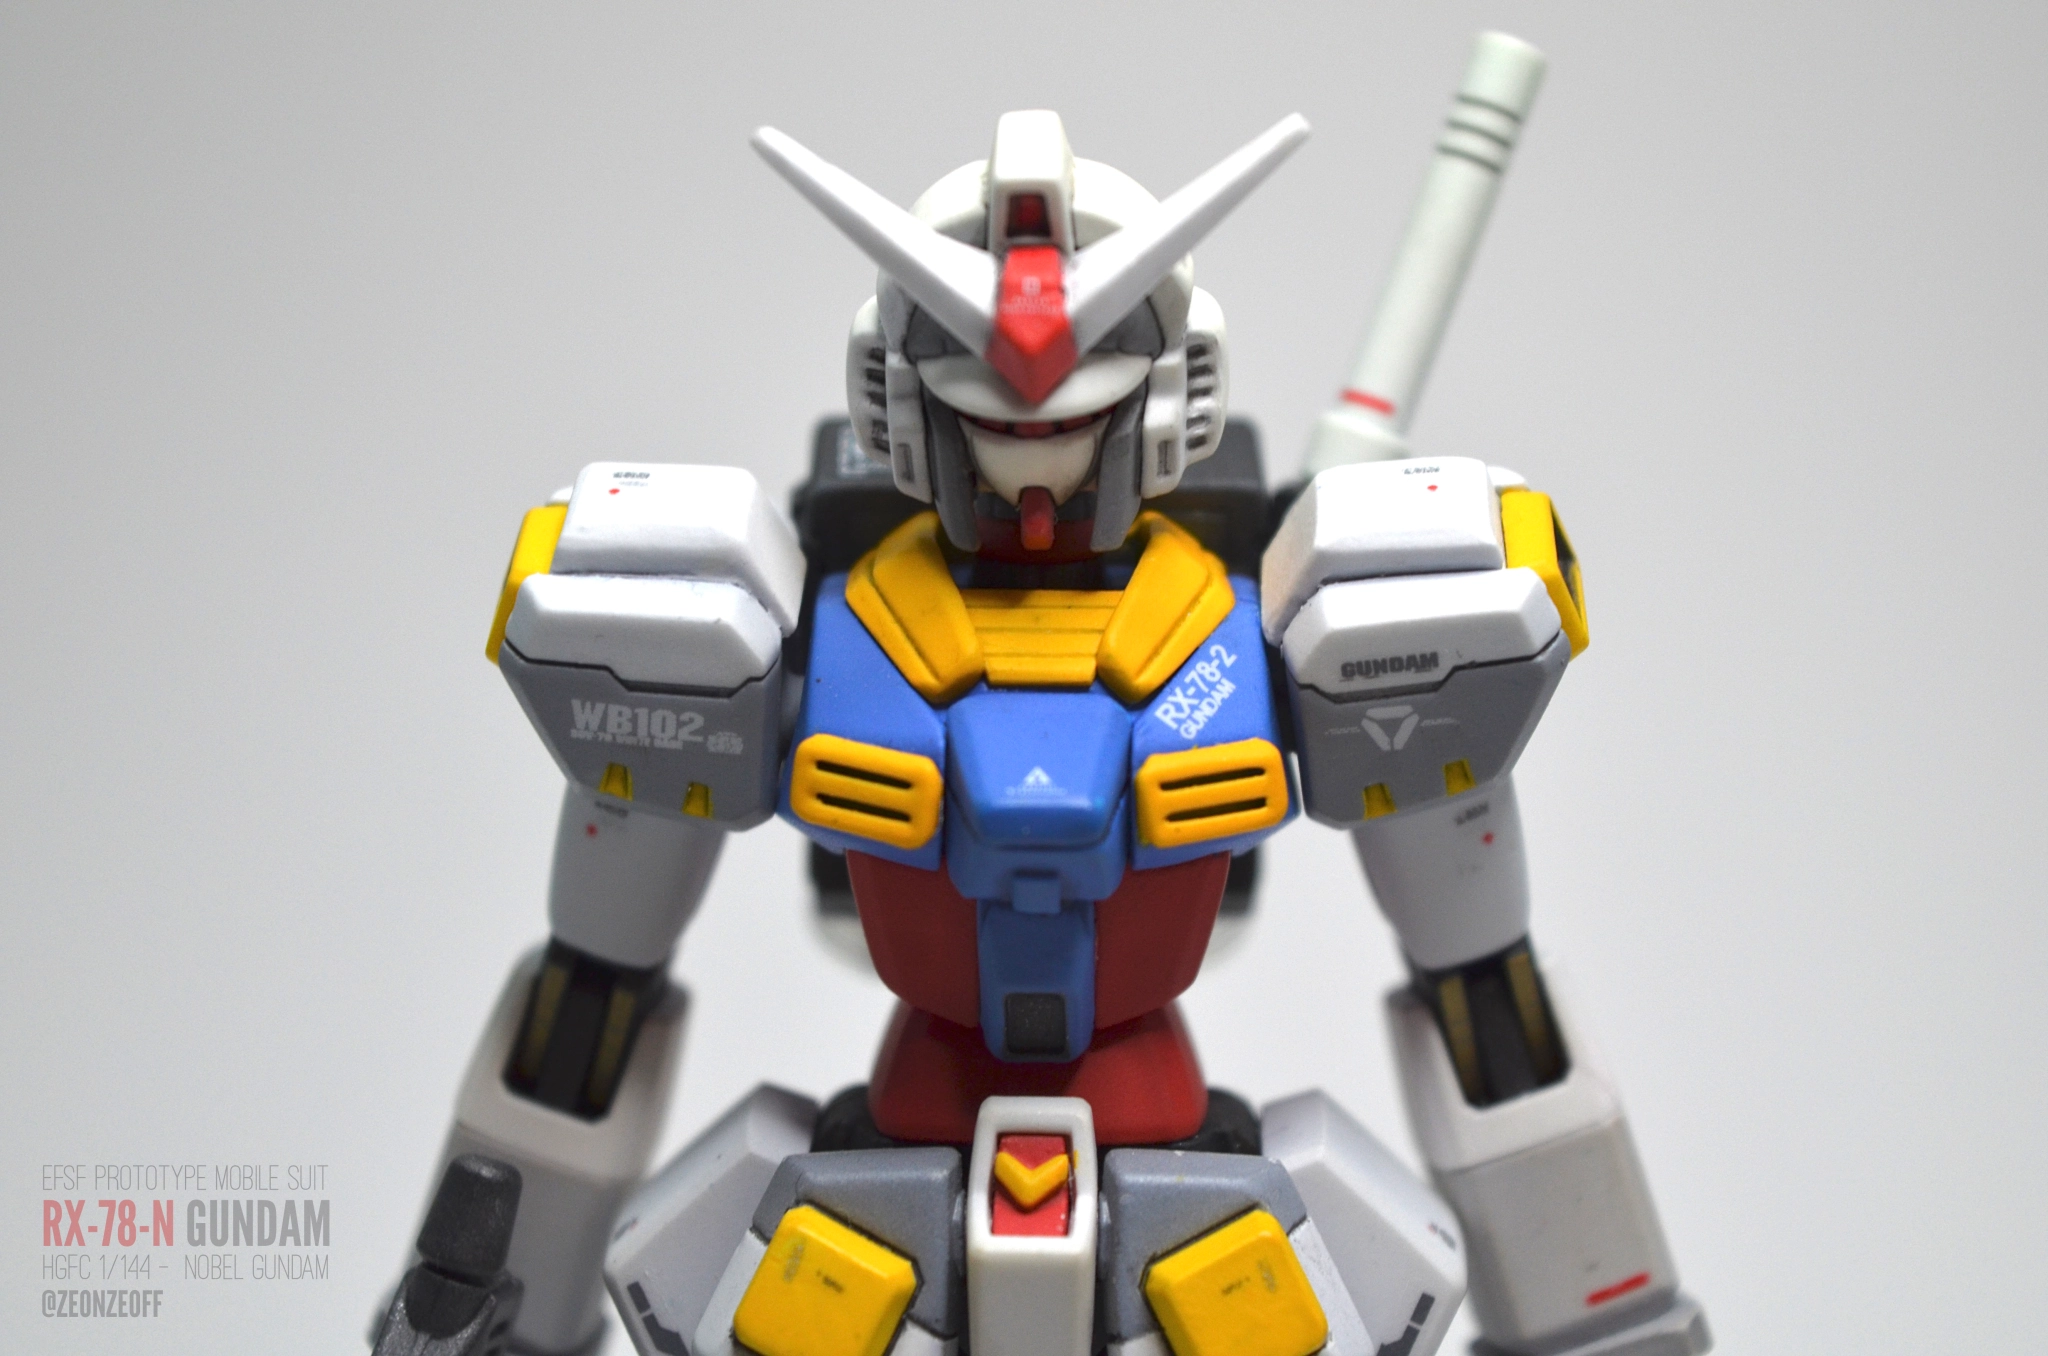
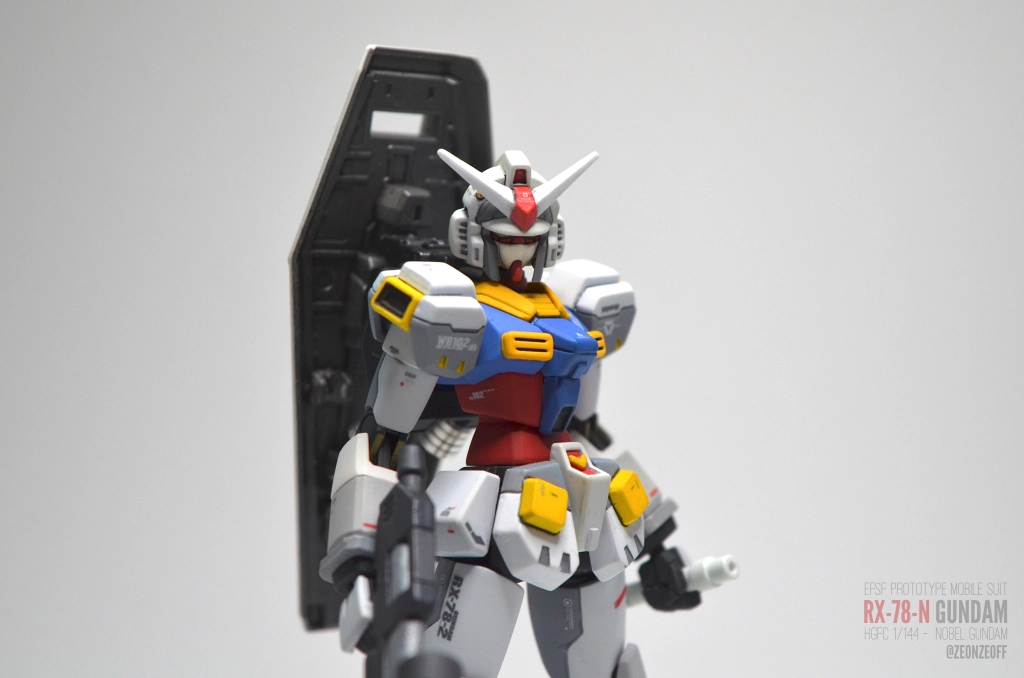
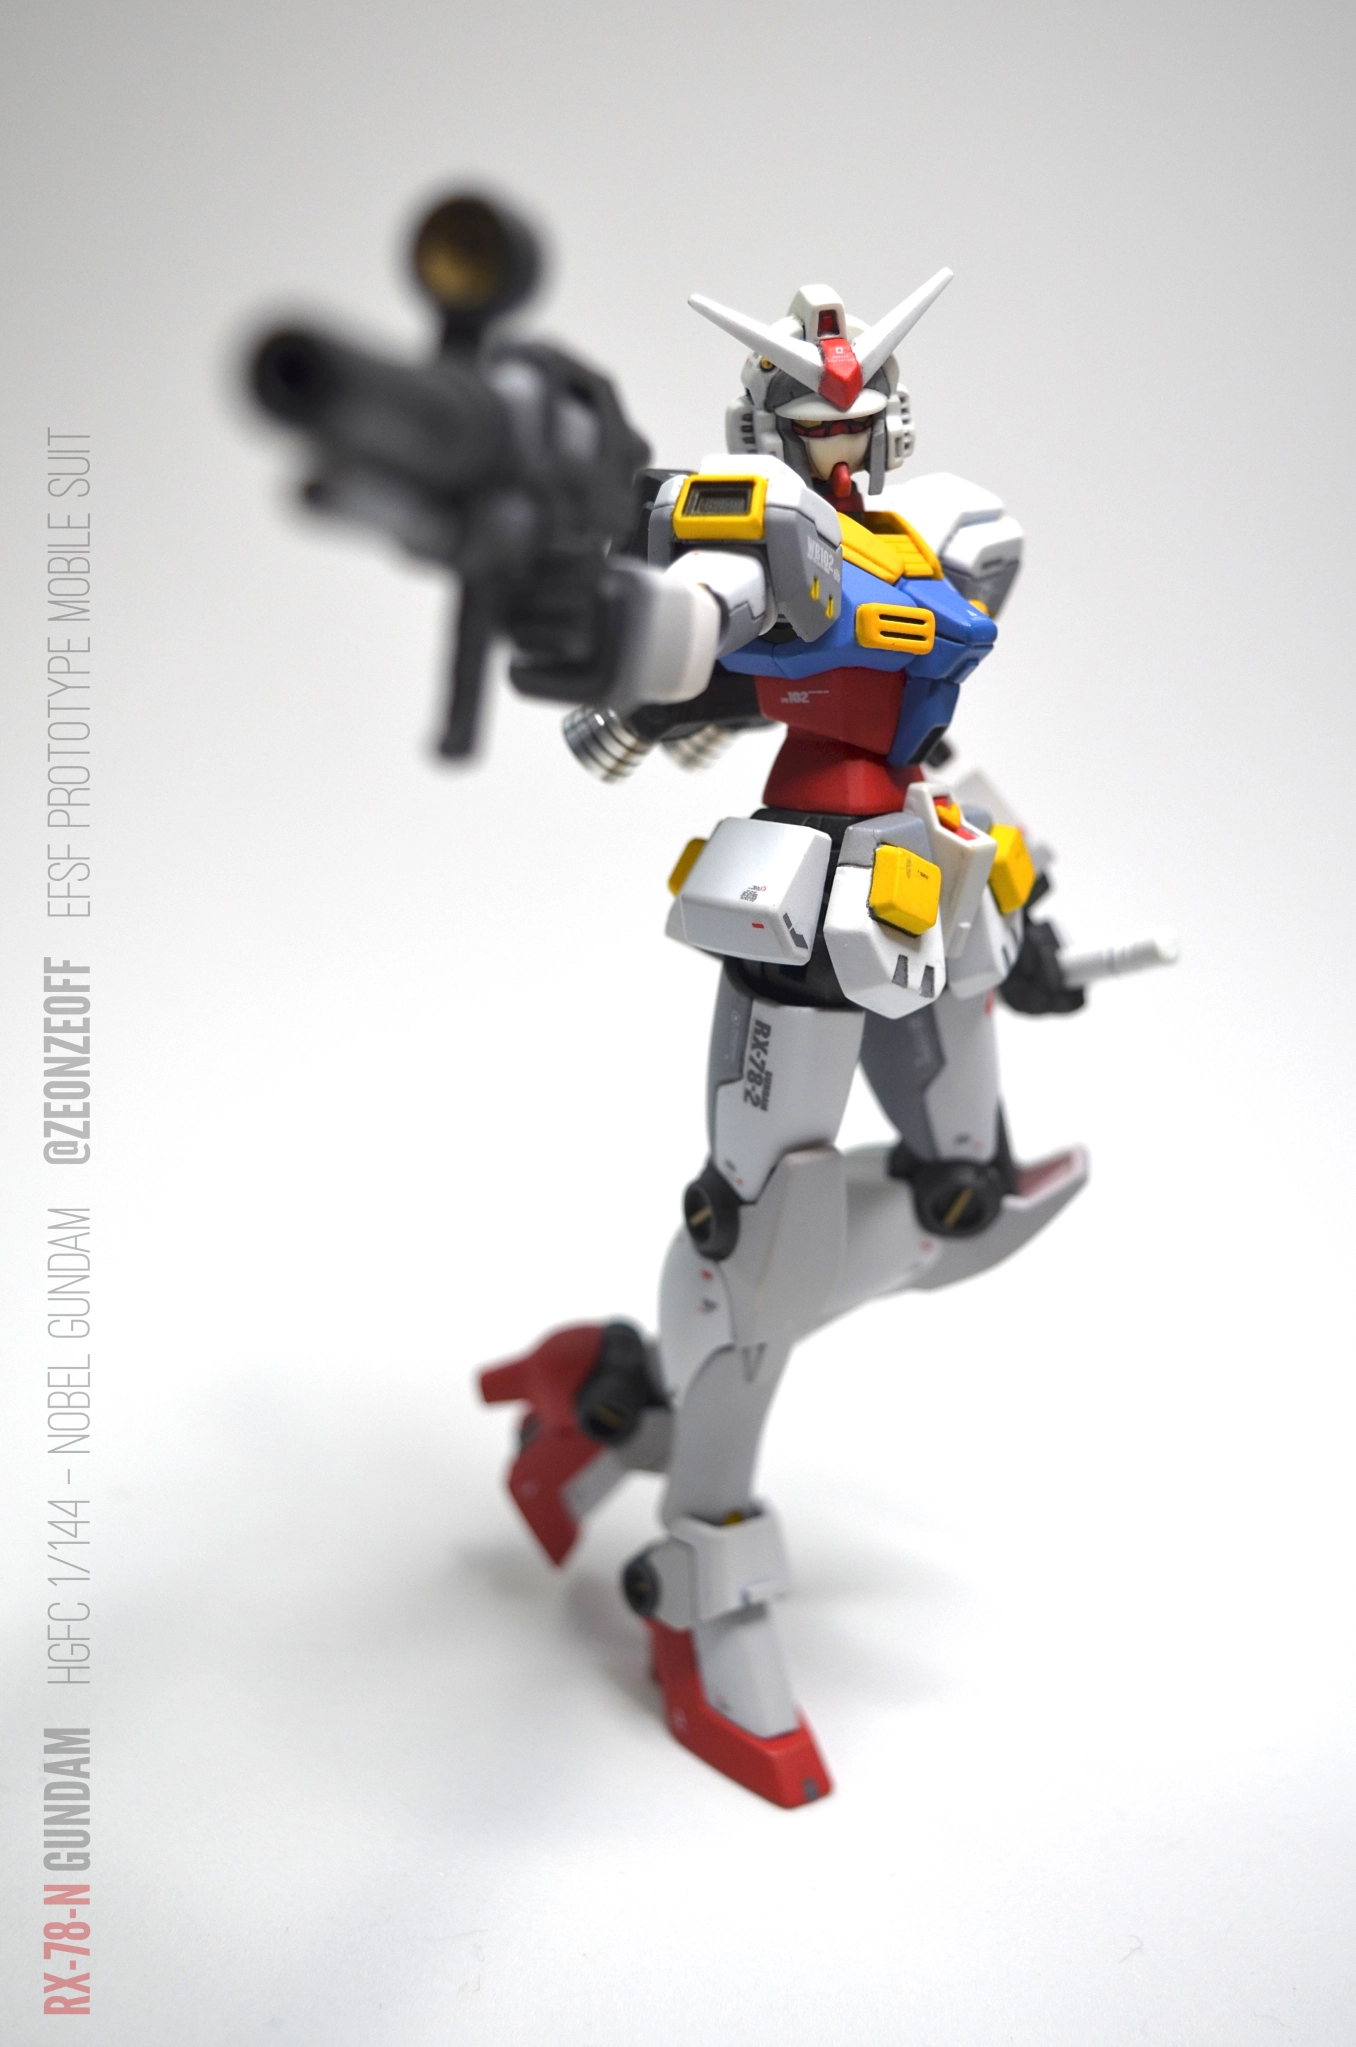
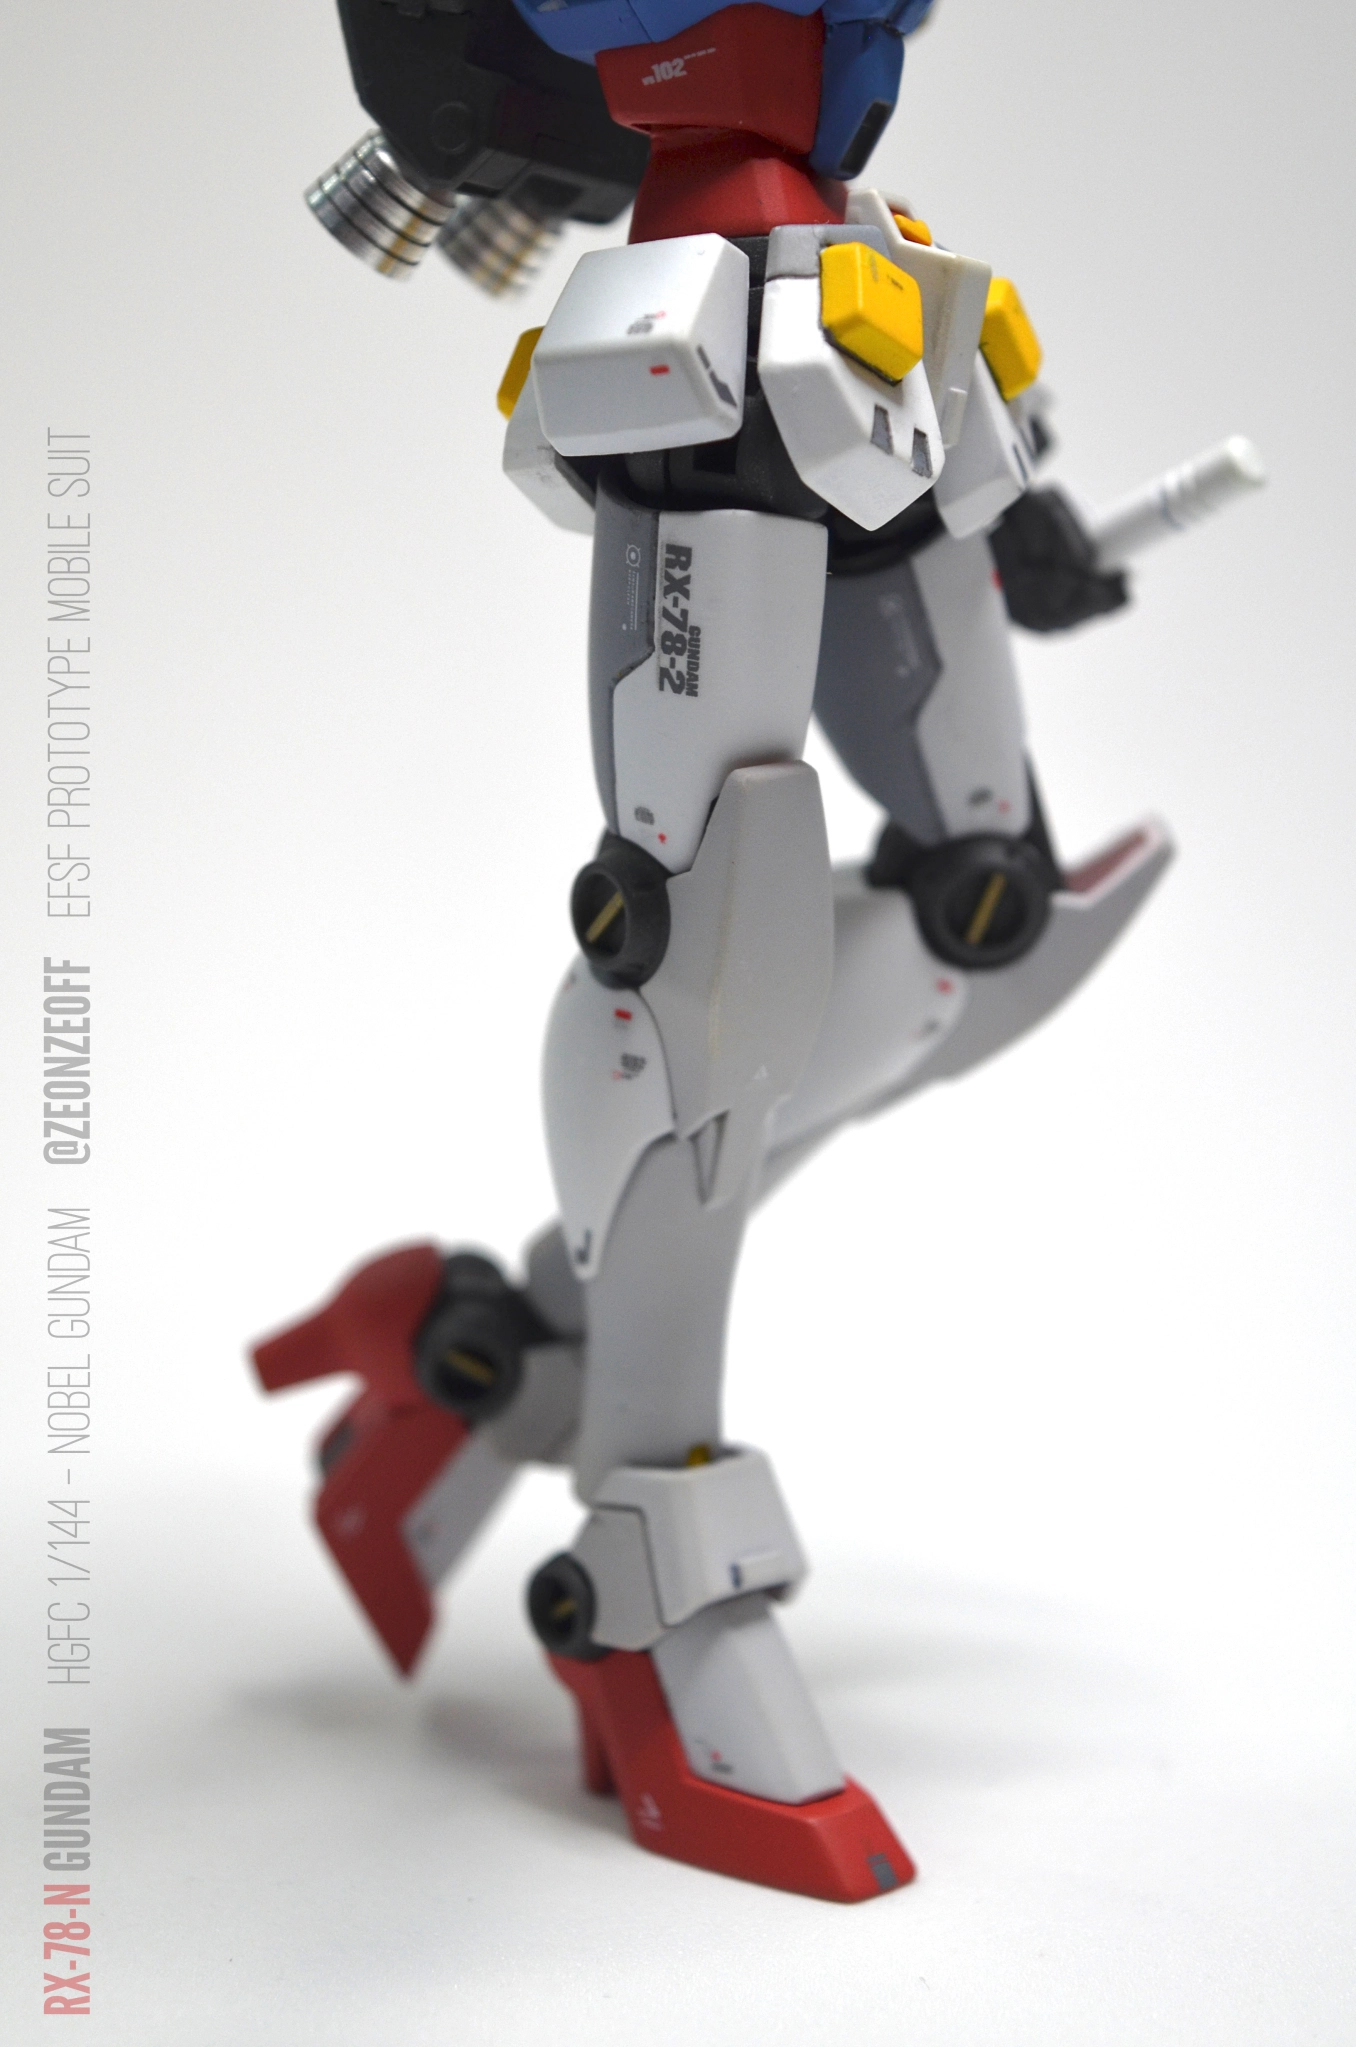
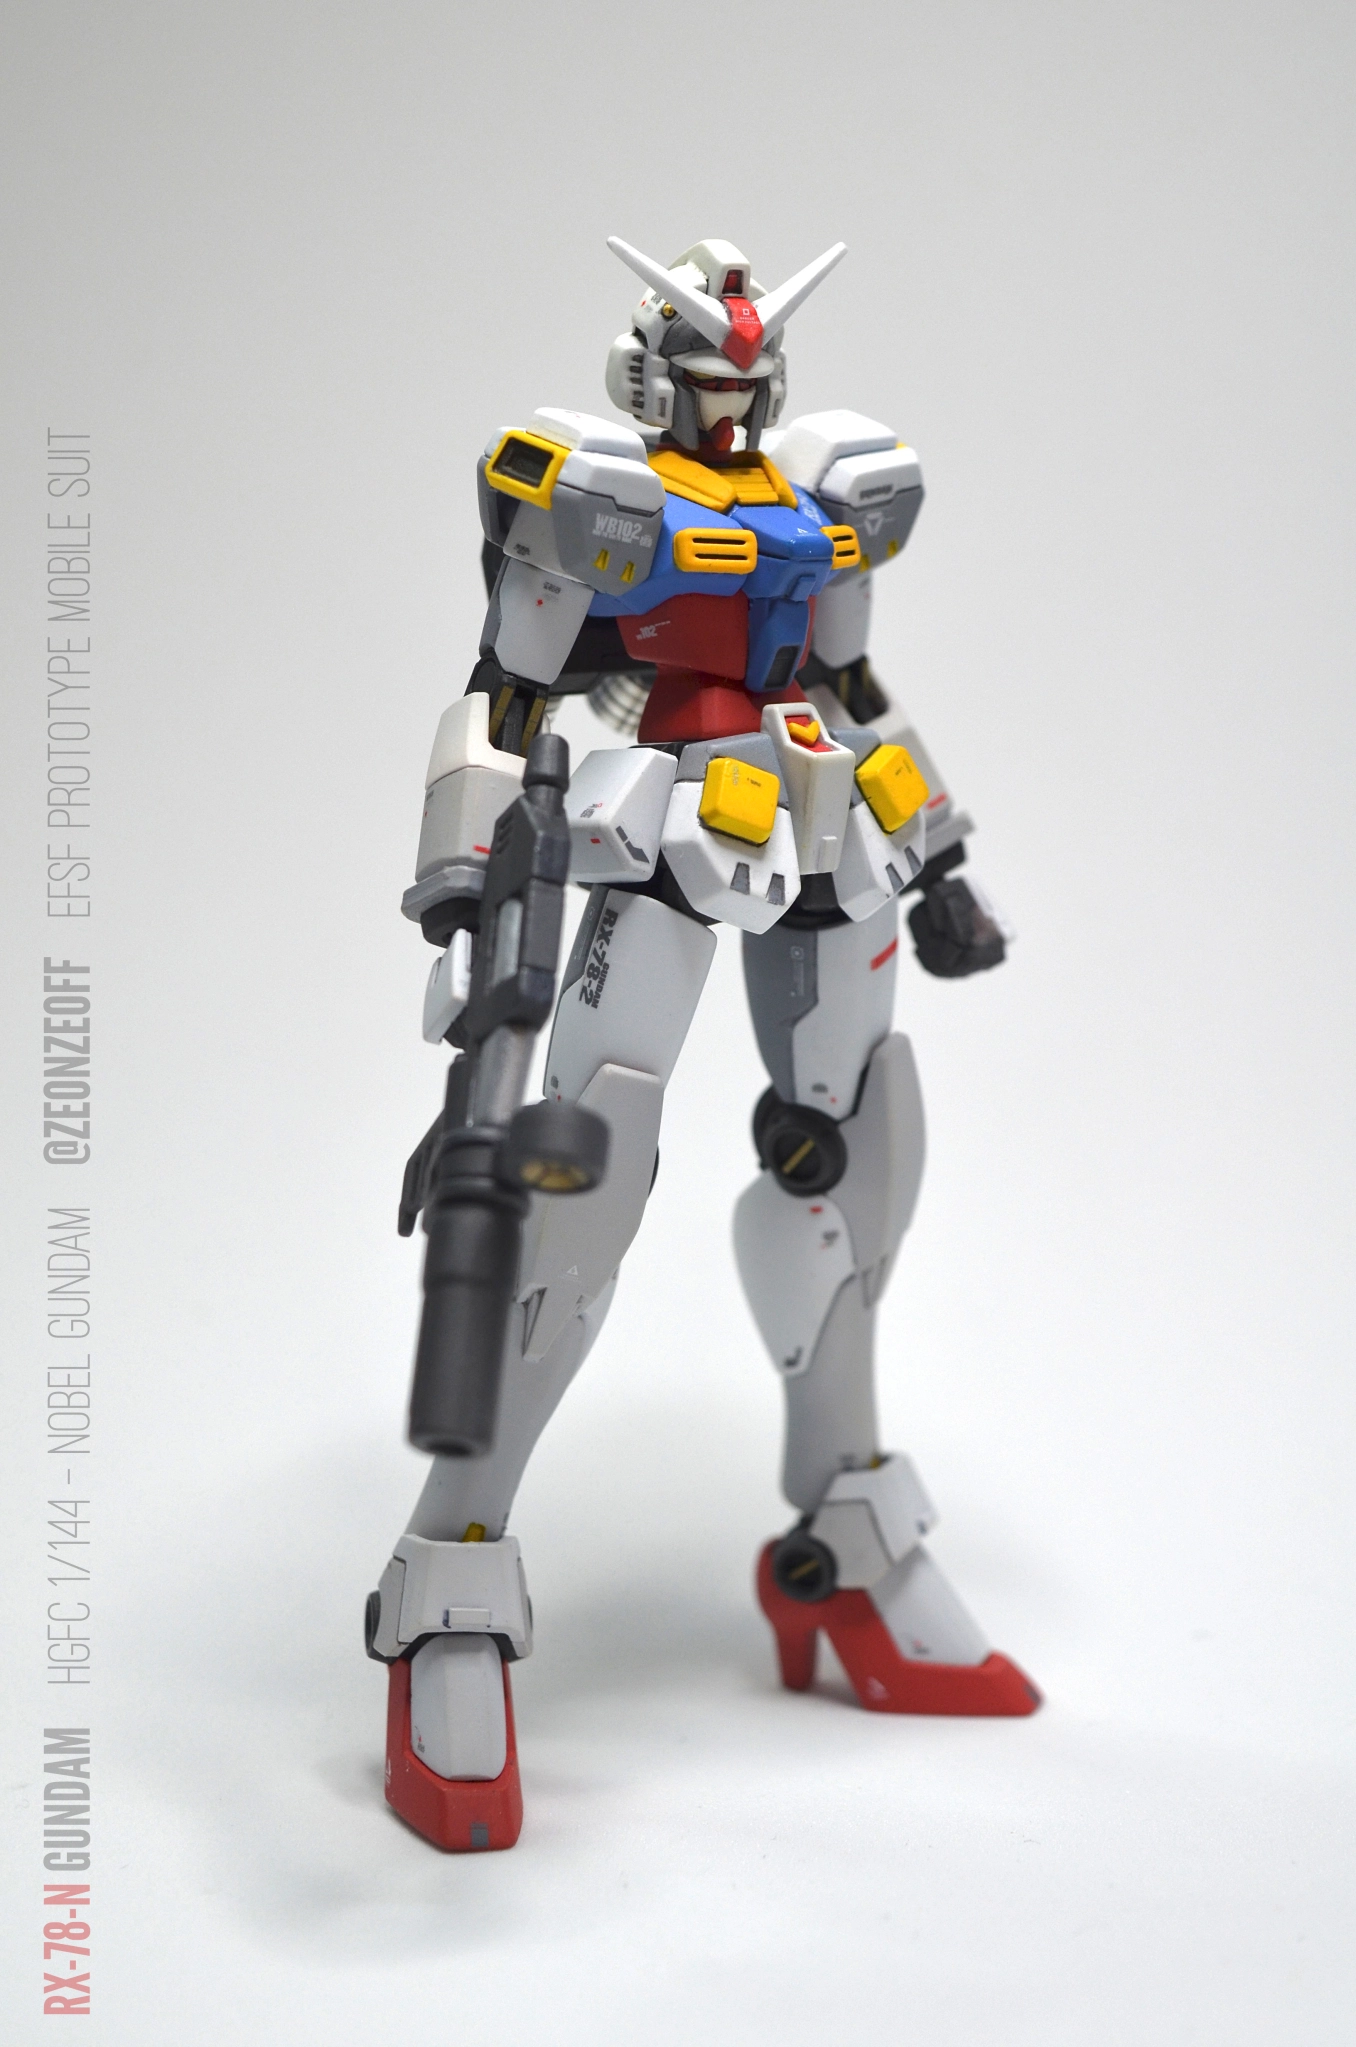
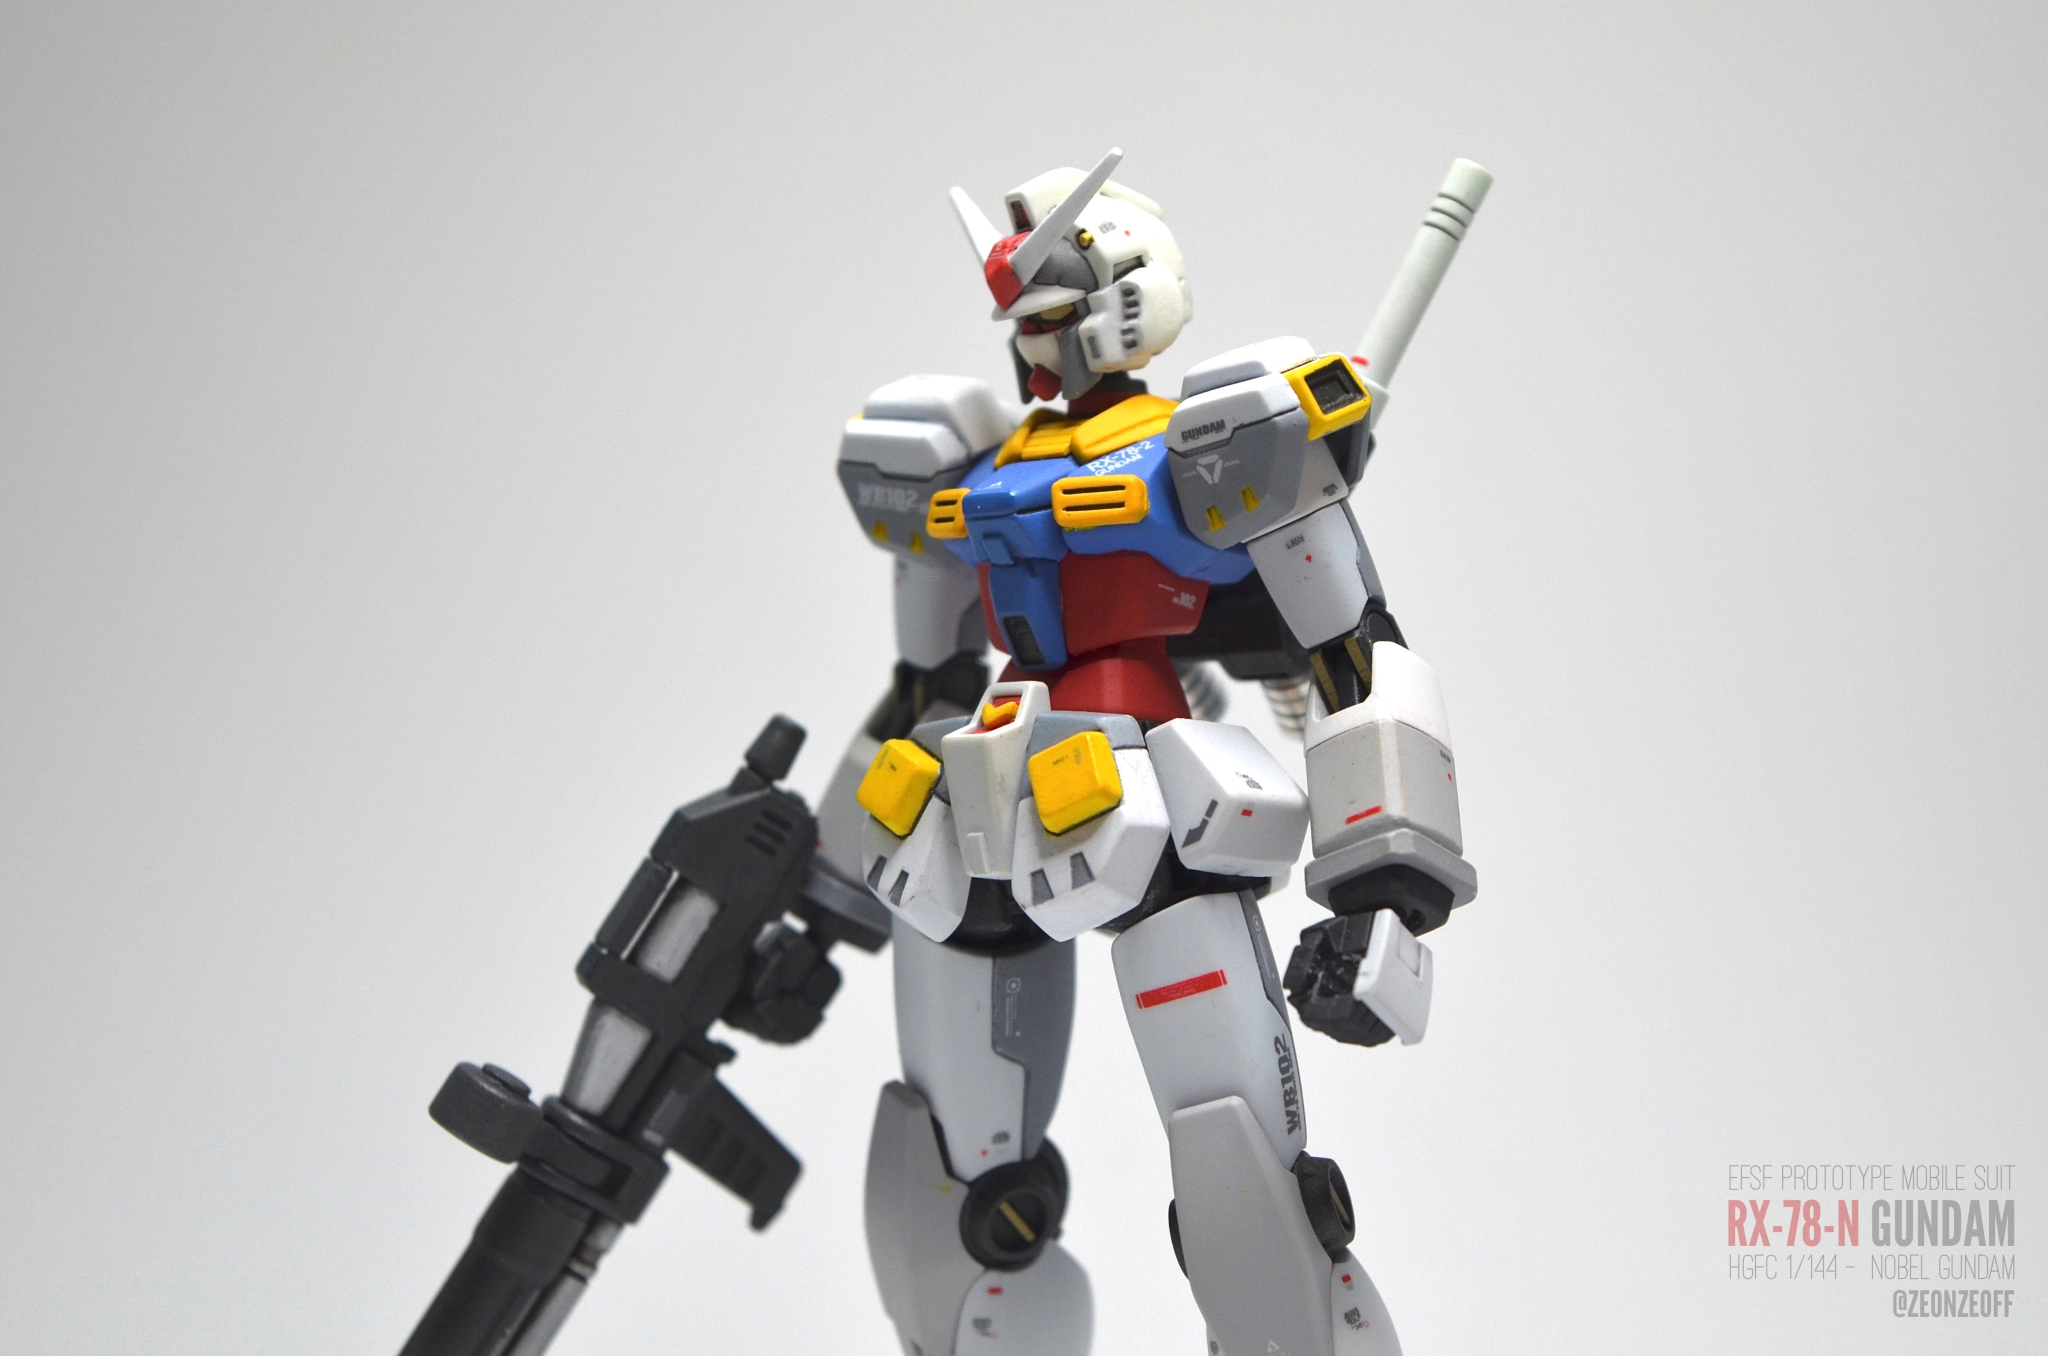
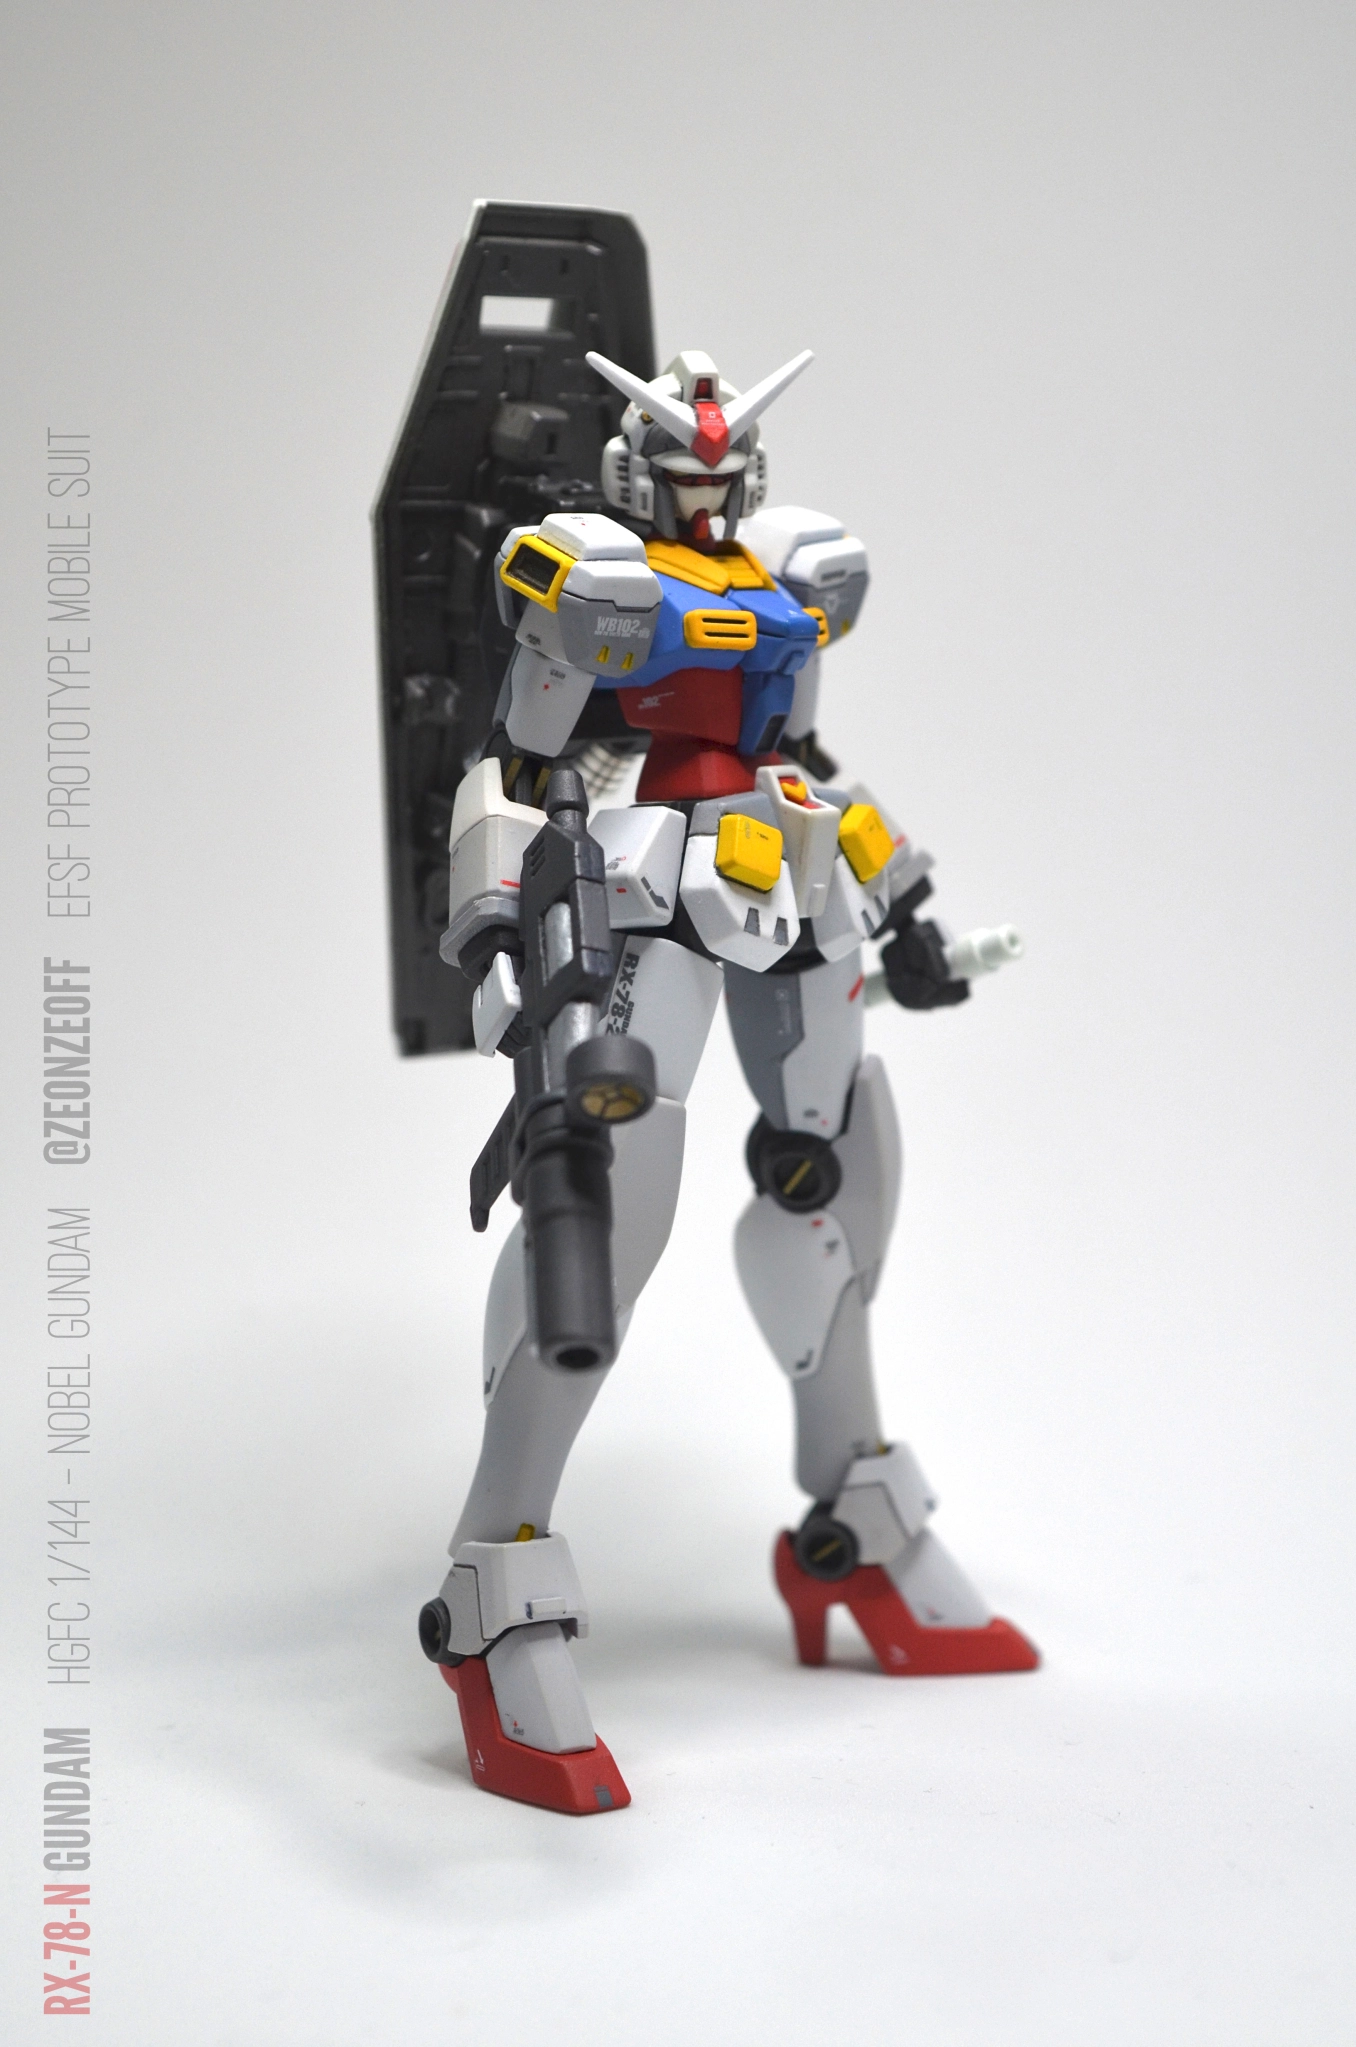
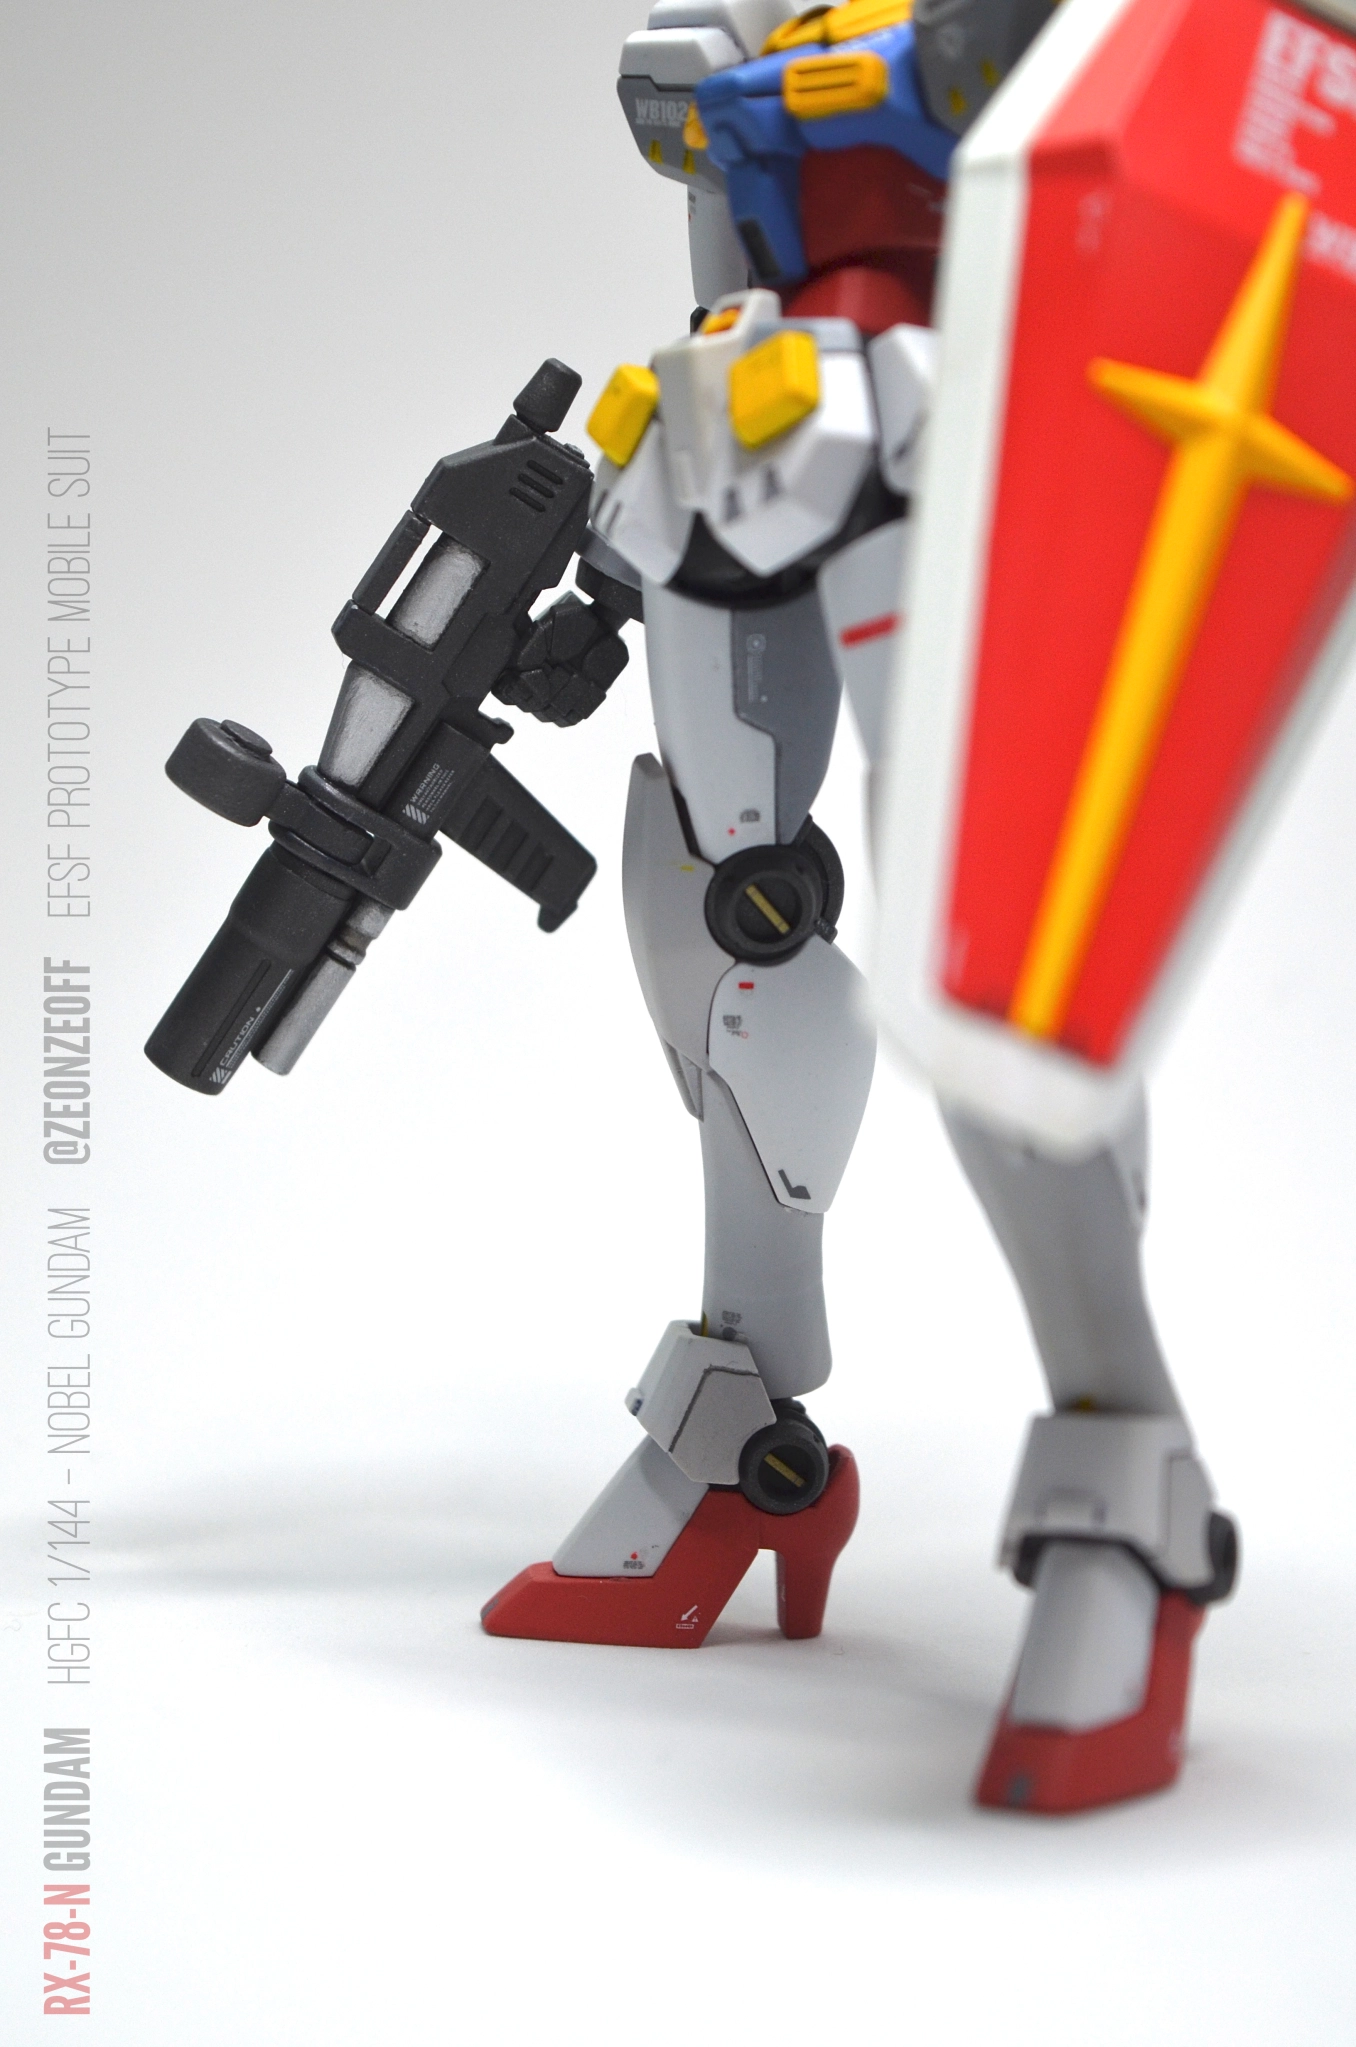
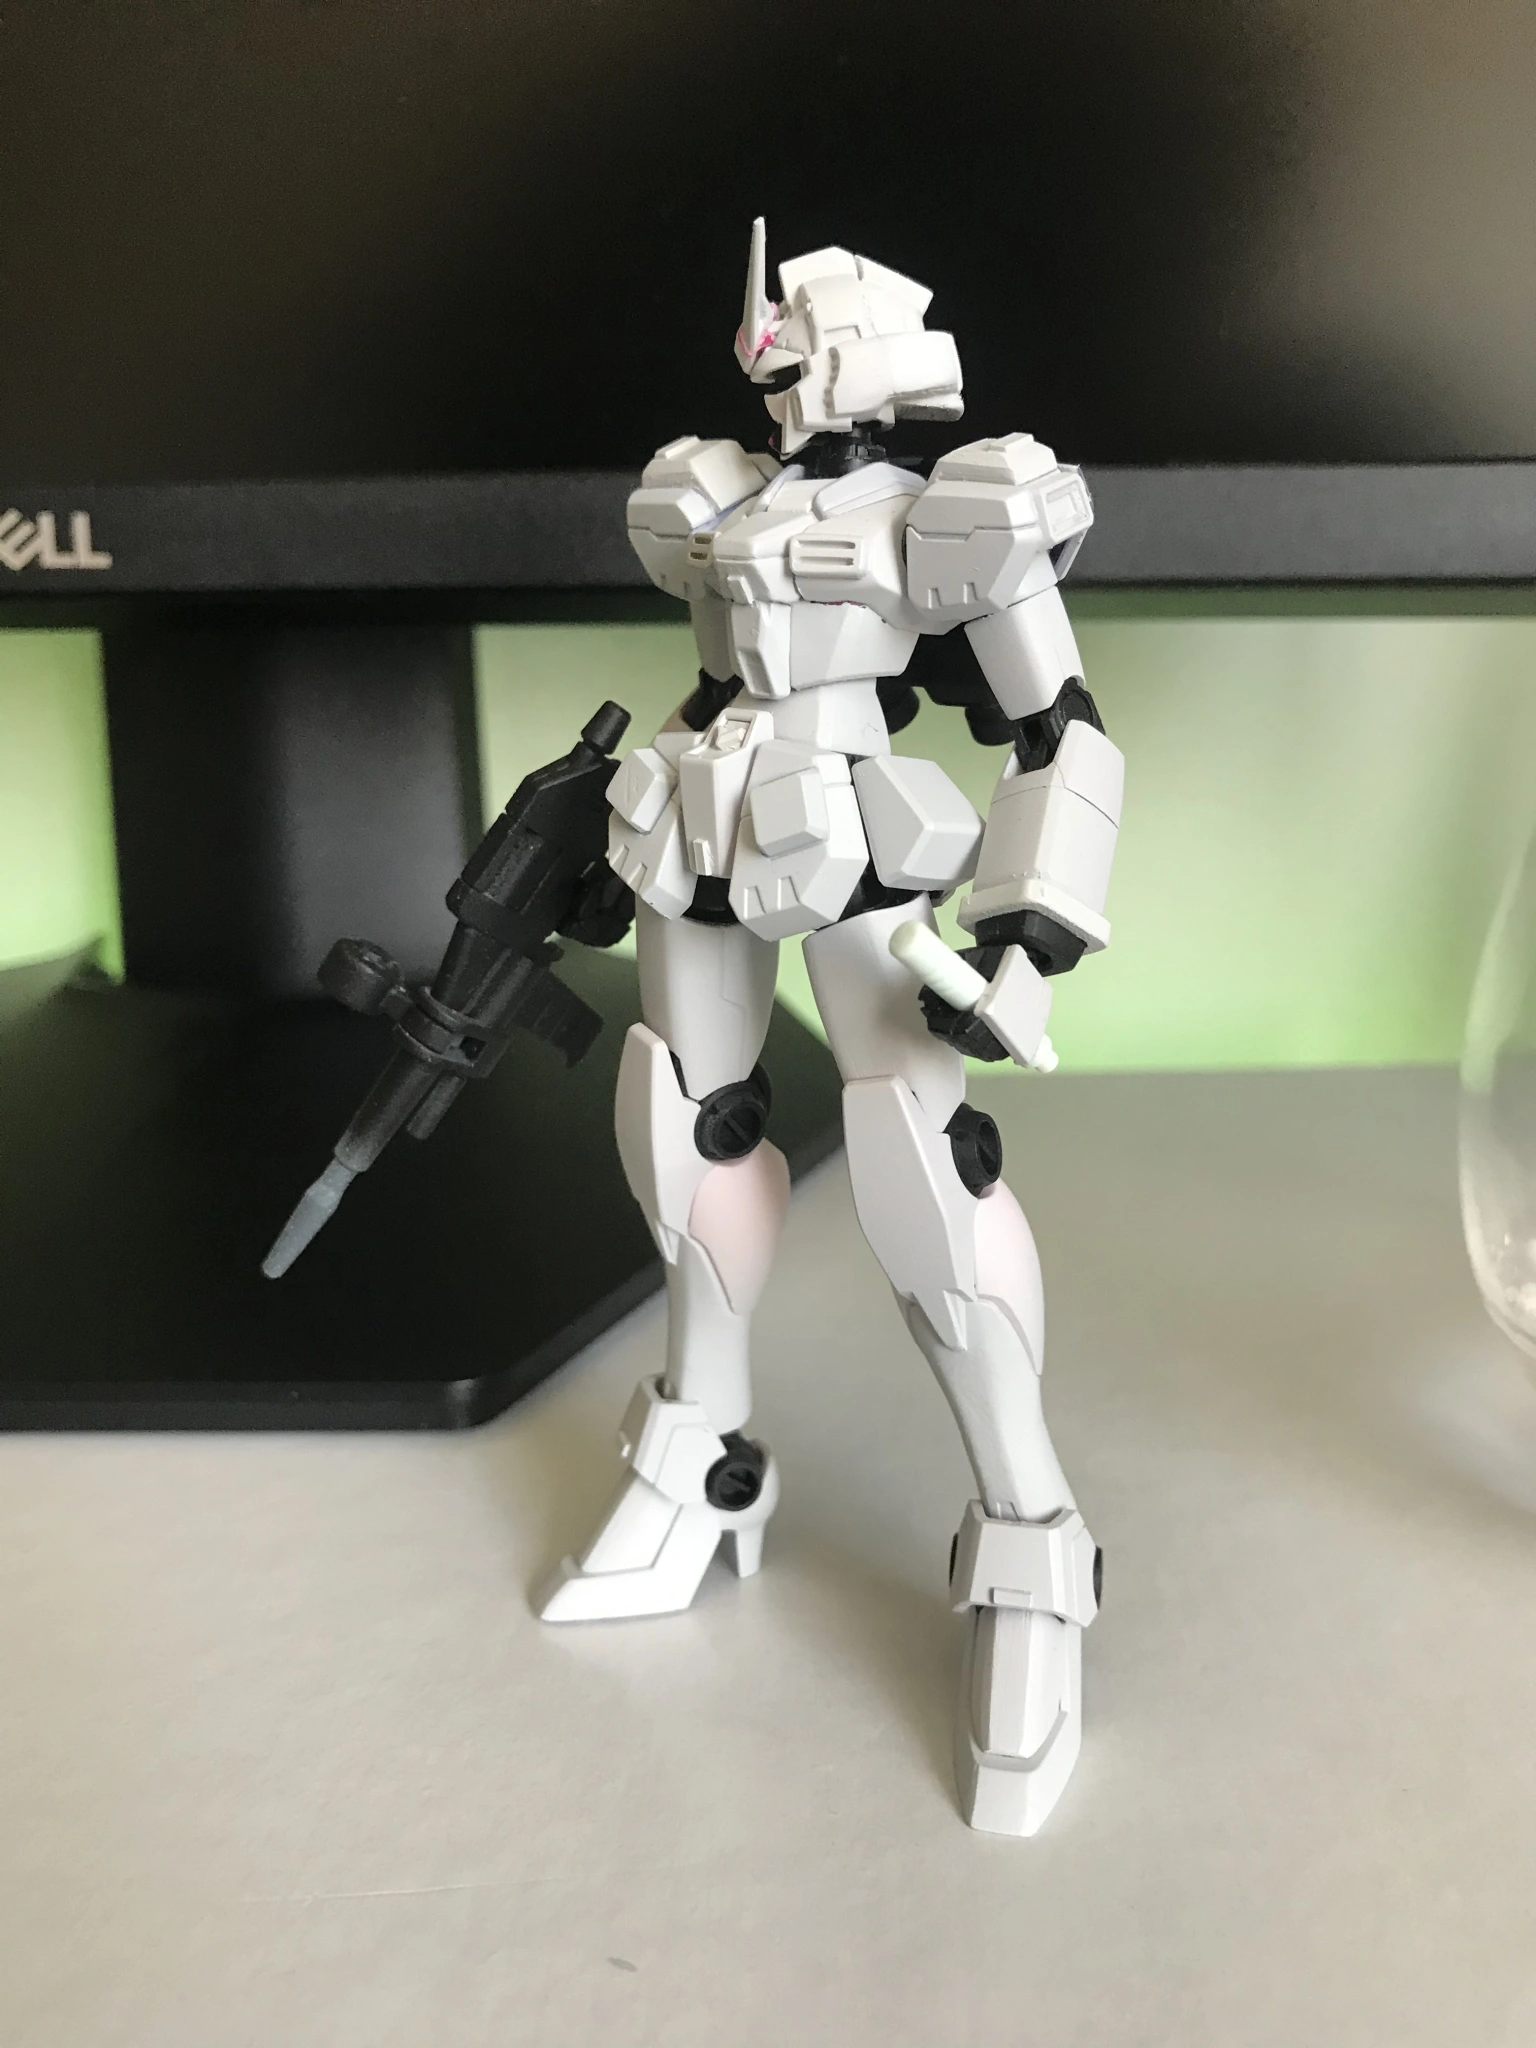
RX-78-N Hello Nobel
Build Duration: November 2020 – June 2022 (Approx. 20 months)
This is my first custom Gundam plastic model build and marks the debut of my alias, zeonzeoff.
I grew up without the money for toys and always coveted model kits like these. The few I managed to get my hands on were second-hand, often incomplete or counterfeit. Now, in my late twenties—with a bit of income and stability—I’ve finally earned the time to devote myself to this hobby.
For this build, I set out to learn the craft of Gunpla: not just assembling, but understanding the techniques that transform a kit into a piece of expression. My approach was simple—copy the masters. I drew heavy inspiration from the talented builder, 白用感叹号, and their HGFC Gundam Nobel > RX-78-2 conversion build. Their work gave me a blueprint, both technically and creatively.
Along the way, I made my own design decisions—some guided by personal taste, others by my limited tools and skills at the time. Every compromise became a learning opportunity.
This build now serves as my baseline—a personal yardstick I’ll measure all future work against. It reflects who I was when I started and will anchor the journey as I grow.
Inception phase
In the last year, I purchased and built a few inexpensive High Grade 1/144 scale mobile suits. This build highlights the first kit I truly wanted to modify.
I spent a long time lurking on Reddit’s r/Gunpla and scrolling through Pinterest, trying to plan a perfect, mistake-free build process. Of course, when I finally started, I made tons of mistakes anyway.
In programming, beginners often start by writing a simple “Hello World” program to test a language's compiler and runtime. For Gunpla, that first step is usually building the iconic and titular mobile suit:
The RX-78-2. The Gundam.
It’s the suit I saw everywhere growing up. At first, I avoided it, thinking it was too common or overhyped. But now, a bit older—and after watching the original TV series—I’ve come to really appreciate its design. It’s timeless. I think it’s fitting to finally build one of my own.
This build log serves as personal documentation of my journey. I welcome any advice, tips, or comments that might help me improve. Smarter people than me have said to document everything and learn in public—so here I am, doing exactly that.
Build Inspiration
While browsing Reddit and Pinterest, I stumbled across Ace Pilot Gunpla’s MS. GM custom build. It struck me as incredibly creative and well-executed. You can check it out here: MS. GM.
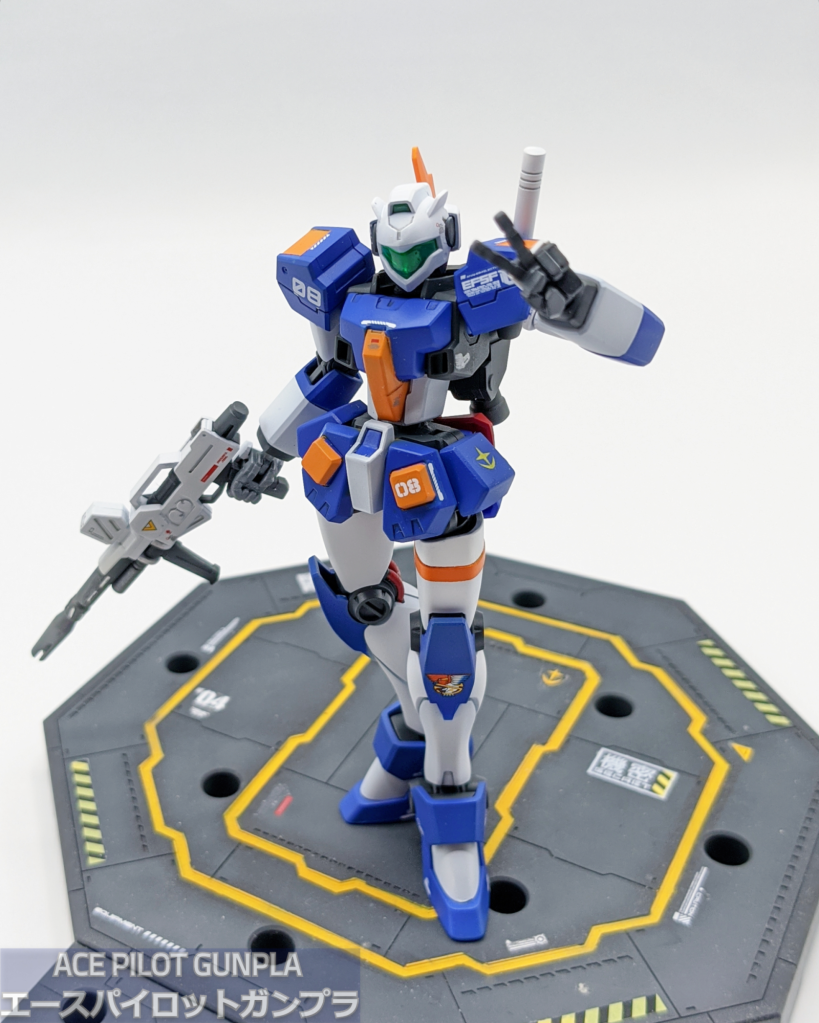
That build opened my eyes to the idea that mobile suits could embody more feminine design language, shapes, and stances. The omnipresent RX-78-2 immediately came to mind—and with that, the idea for my own project was born.
Like Ace Pilot, I decided to use a Nobel Gundam as the base and convert it into an RX-78-2. It would be my “Hello World” Gunpla project—the first build where I would go beyond straight building and attempt a real custom.
I knew it was probably not a new idea, so I searched for “Gundam Nobel customs” and eventually discovered a standout example by 白用感叹号.
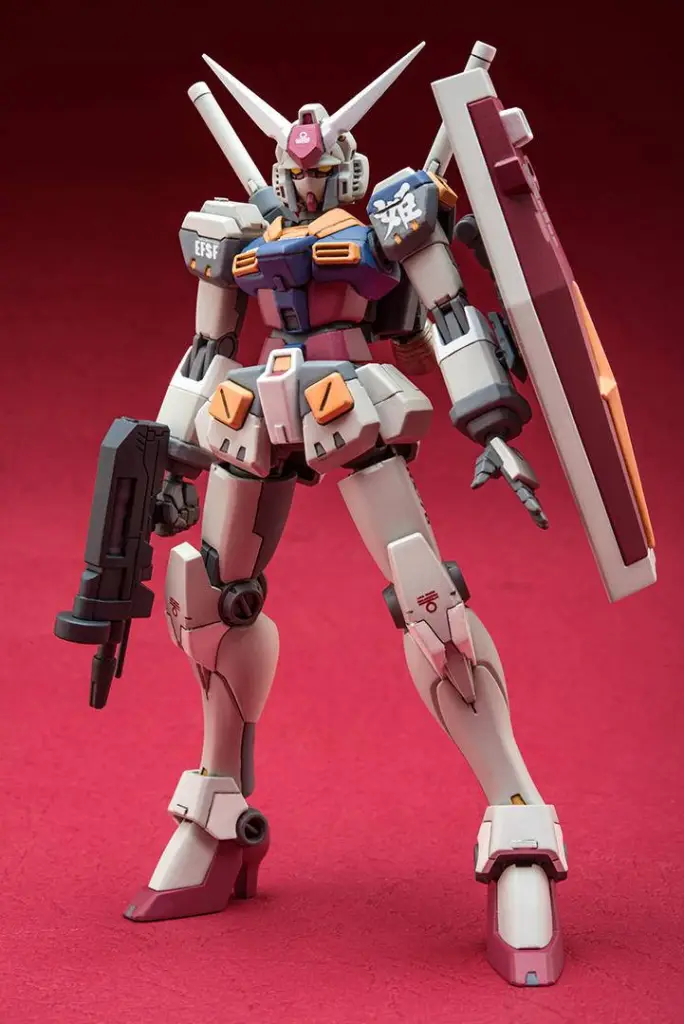
As someone new to the craft, I believed the best way to learn was to copy and steal from the masters, or at least from someone with significantly more experience. I was slightly bummed to learn that I wasn’t the first to attempt this concept—but also relieved that it had been done so well. Their build gave me a reference point—something aspirational to study, learn from, and build upon.
Custom Training Regimen
By attempting to replicate this build, I designed a kind of custom training regimen for myself. The goal was to push beyond my comfort zone by combining skills I already had with techniques I’d never tried before.
-
🔧 Practice - Skills from Carpentry and Architectural Model Building
- Building new forms from scratch
- Putty sculpting
- PLA (plastic plate) plating
- 3D printing components
- Building new forms from scratch
-
🧪 Learn - New Finishing Techniques by Hand
- Airbrushing
- Scribing panel lines
- Light weathering and panel lining
- Applying water slide decals
Copying great builds and products is a powerful way to grow. This approach pushed me to explore new techniques and adapt on the fly—skills I wouldn’t have developed if I stuck to out-of-box builds.
I also kept costs low and realistic, so that I wouldn’t resent my inevitable mistakes.
Gunpla Kits
I bought myself these three kits to start my build.
2009 Gundam 00 High Grade GN Archer- $15 purchased through Gundam Planet
- 2011 High Grade GF13-050NSW Nobel Gundam Berserker Mode
- $28 purchased through Ebay
- 2017 High Grade HGBF RGMGM-79 GM/GM
- $18 purchased through Ebay
- 2020 Entry Grade RX-78-2
- $9 purchased at Target
When I first learned that Ace Pilot Gunpla used the Nobel Gundam for their Ms. GM build, I had never even heard of the suit. It turns out it’s from the anime Mobile Fighter G Gundam and is piloted by Allenby Beardsley.
Out of curiosity, I watched the first two episodes—but decided to pause and jump into the original Mobile Suit Gundam series instead. I had already seen Iron-Blooded Orphans while it aired, but I wanted to fully immerse myself in the roots of the franchise. Since then, I've been enjoying the world of Gundam immensely—especially as my longtime interest in Star Wars has started to fade.
The HGFC Nobel Gundam is a simple and charming kit. It’s incredibly easy to assemble and disassemble, with a level of poseability not often seen in other High Grade kits. While the color separation leaves something to be desired (making painting more involved), the overall design and build experience were positive.
Even my fiancée got a kick out of it—she was surprised and amused to learn that a Sailor Moon-inspired Gundam even existed.
At the time, I had hoped to get the standard version, but the only one in my budget was the Berserker Mode variant on eBay. The two are nearly identical, with the only differences being color (irrelevant since I’d be repainting everything) and the “hair” sculpt (also a non-issue, as I planned to craft a custom RX-78-2 style headpiece).
While kitbashing, I realized something funny: I didn’t use any parts from the GN Archer, despite having purchased it. Since I wasn’t aiming for a GM-style conversion, the GN Archer wasn’t really needed—but I built it anyway for fun. It now lives on my shelf with basic Gundam Marker panel lining and a matte topcoat.
But this was also the point where reality hit me: Once I catalogued all the modifications I’d need to make to achieve my vision, I felt genuinely overwhelmed.
Modifications
- 3D printed
- back of helm
- cockpit
- chest grills
- leg/shin extensions
- wrist guard
- PLA Plating
- pauldron bulk
- chest/collar
- Needed more parts from EG RX-78-2
- V-Fin
- groin v-fin motif
- shorten Beam rifle
- GM Shield edits (removal)
- GM Backpack mod
- General scribing
That turned out to be a lot more than I could handle without the right supplies. I ended up putting the whole project on the back burner and chipping away at it for a year and a half.
I had to:
- Buy an airbrush and compressor
- Build a paint booth
- Research paints and learn how to use them
- Design and 3D print parts
- Test fit, modify, repeat
- Sand everything
- Prime the whole kit
Crap.
Over that year and a half, I made countless mistakes. I’d get discouraged, put the project down, then pick it up again—sometimes days later, sometimes weeks, sometimes months.
I often imagined myself one day building in a well-stocked workshop, surrounded by expensive kits and tools. But first, I had to earn that future. I told myself: prove you can make something worthwhile with entry-level supplies before you throw your money at a hobby you're not yet committed to mastering.
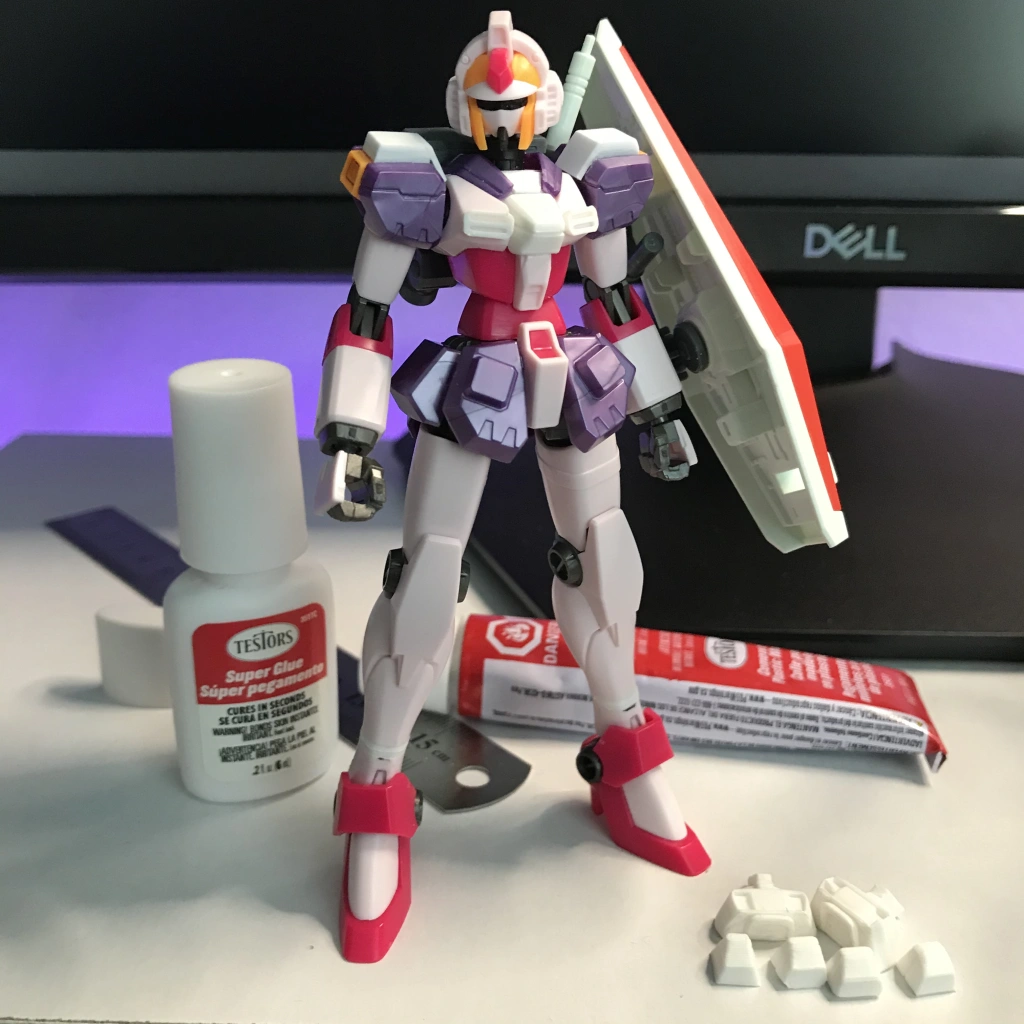
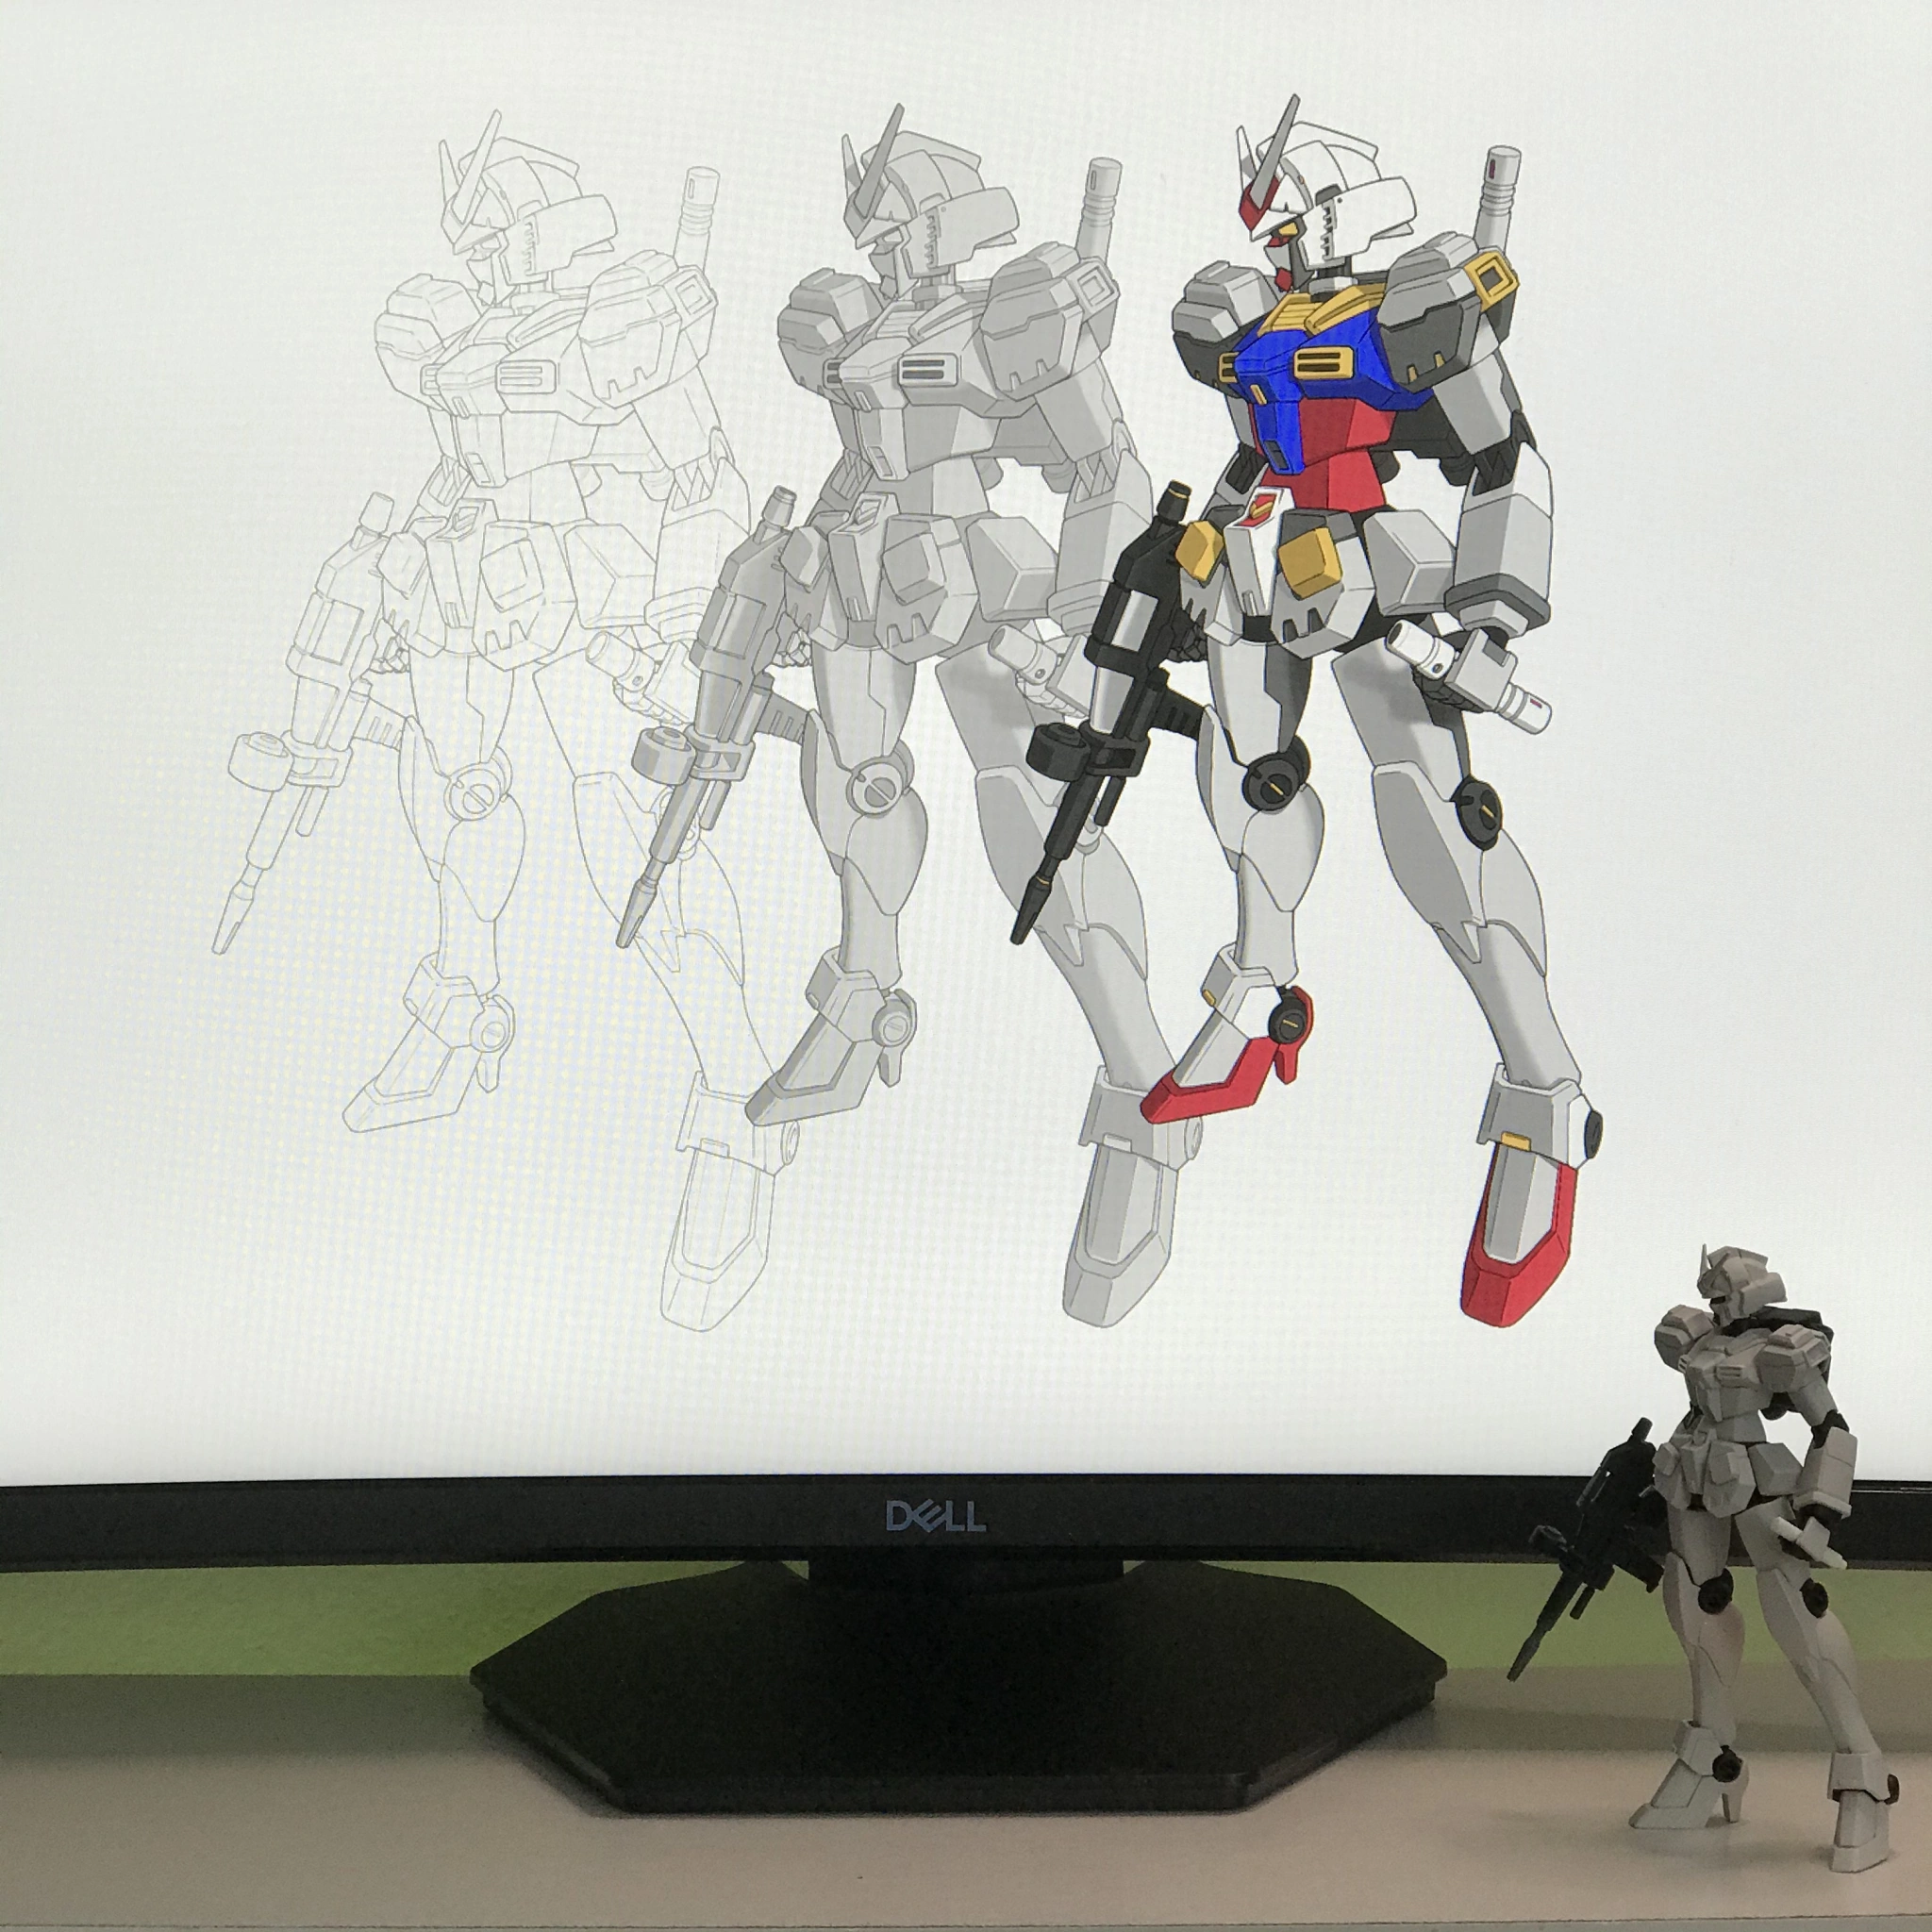
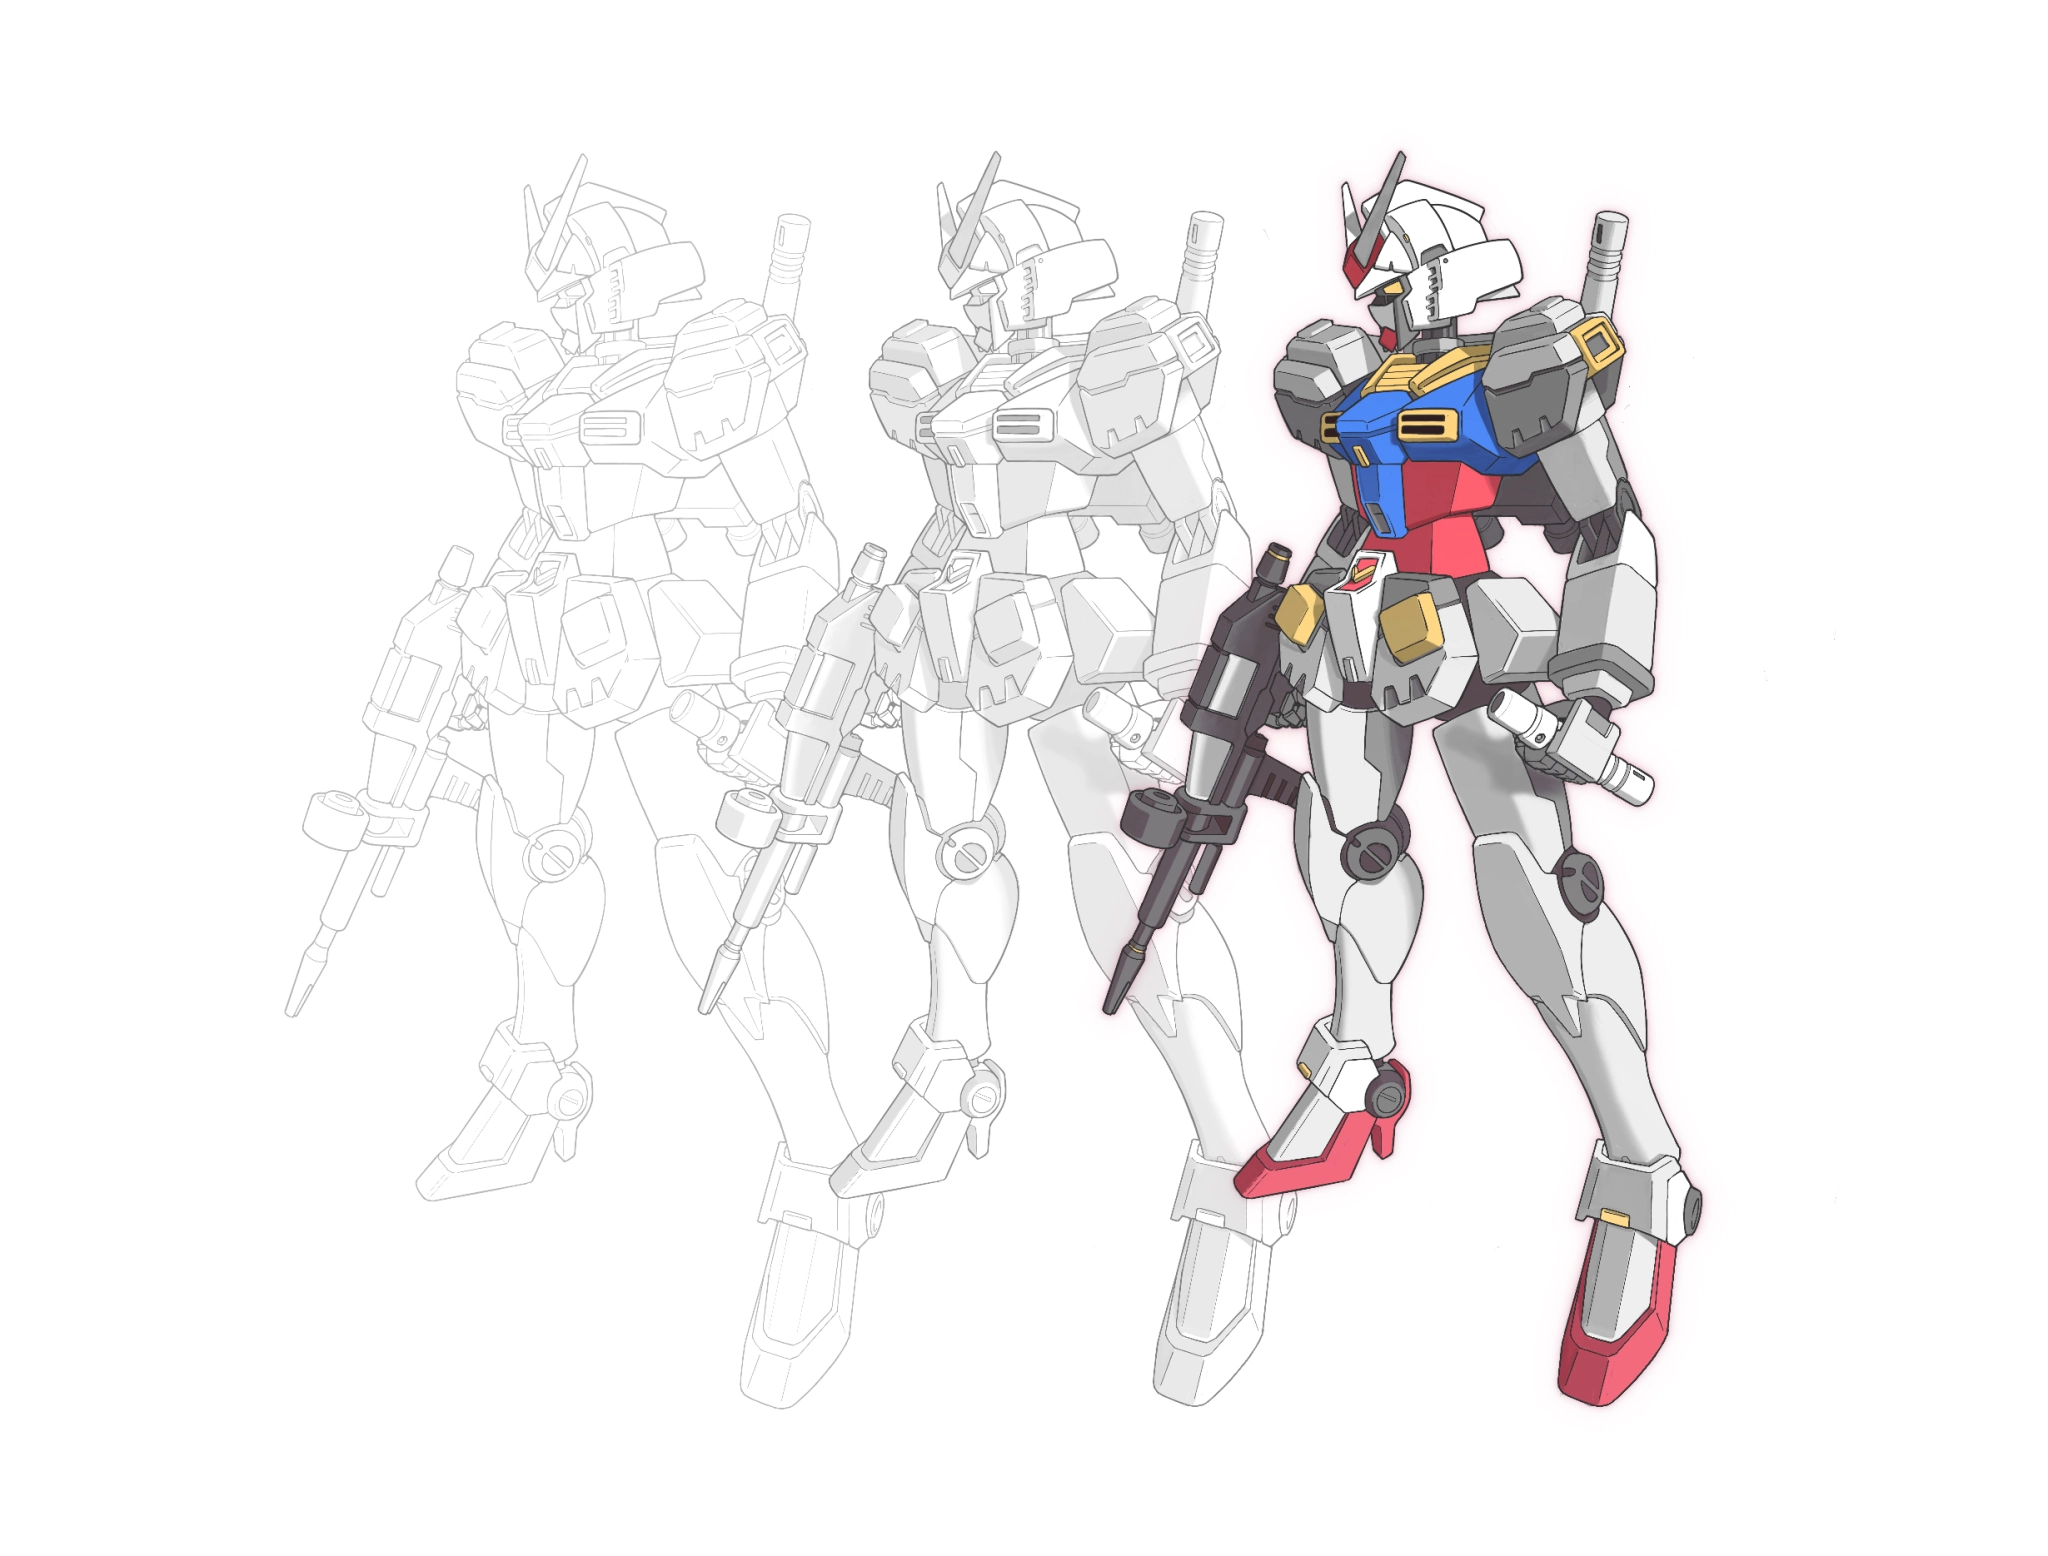
For a long time, the model sat in primer. I was intimidated by the next step: airbrushing. The fear of messing it up froze me. So I procrastinated—but productively.
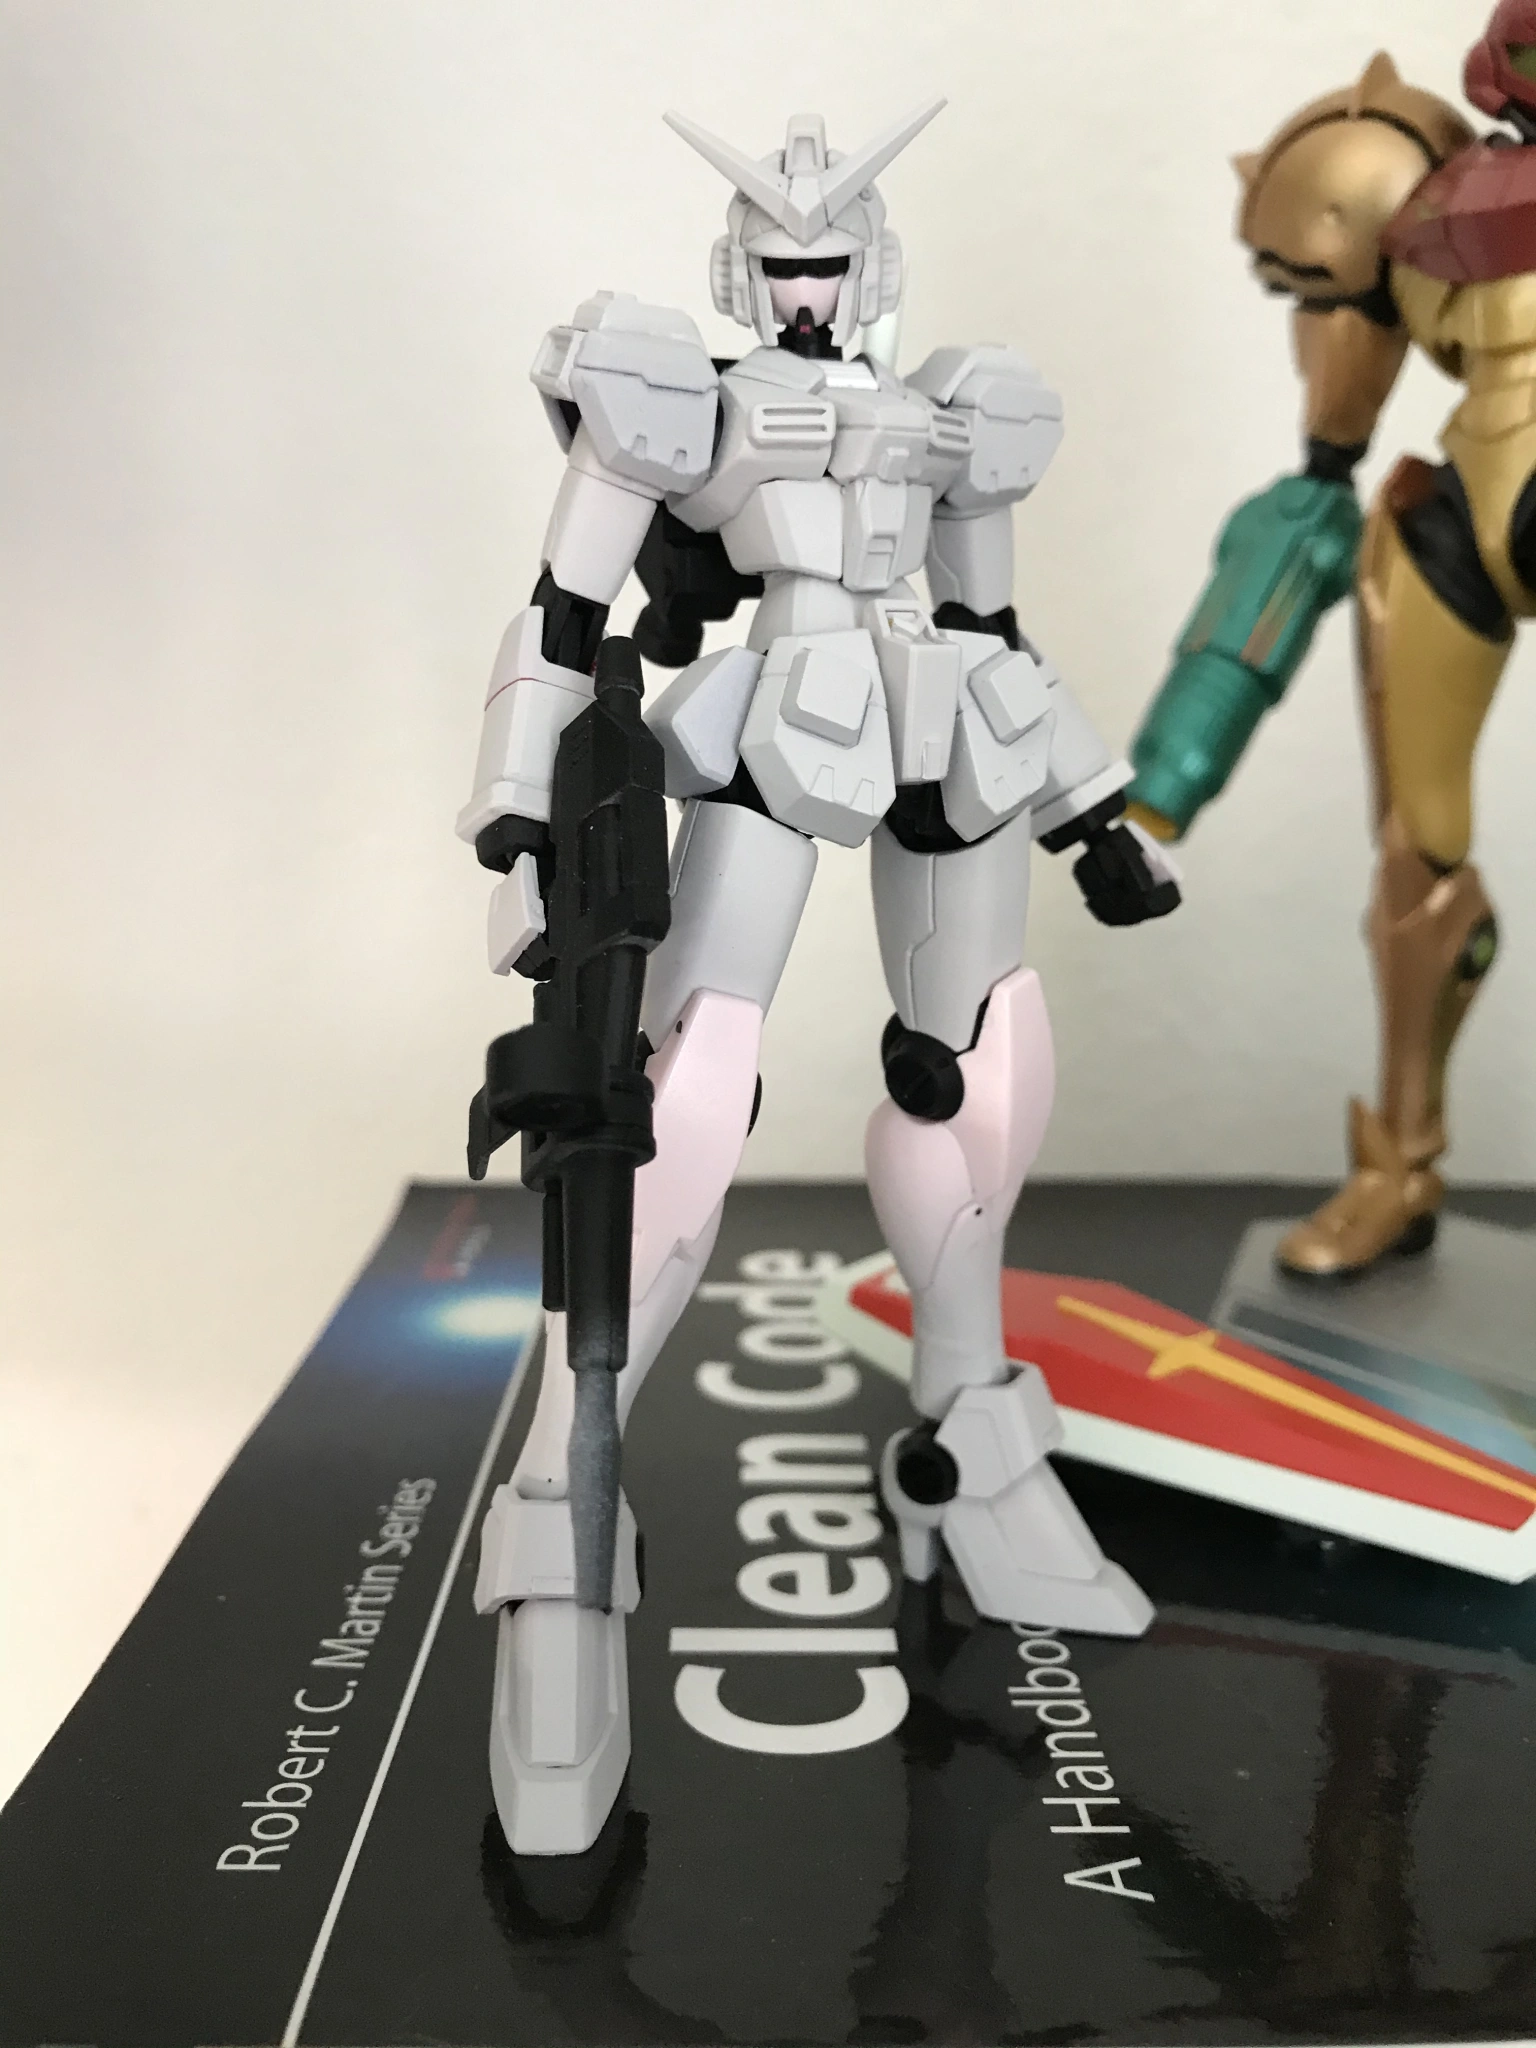
To ease my nerves, I mocked up the color scheme digitally. I traced a photo of my build and spent about a week testing color combinations, adjusting and refining until the scheme felt right.
The Workstation and Materials
Between winter 2021 and summer 2022, I gradually began stocking my workstation. I probably forgot a few things, but this is the bulk of what I picked up. Every time I hit a wall because I lacked the right tools or supplies, I delayed the project. One missing item could stall me for weeks.
I bought gear from all over—Amazon, local craft stores, and eventually, after moving to Mercer Island near Seattle, I struck gold: a dedicated Gunpla store called International Model Toys, run by Tom Dang.
Tom is not only incredibly knowledgeable but also a skilled Vietnamese Gunpla master modeler. I now go to him for everything. Supporting his shop feels like investing in the local hobby scene—and in my own progress.
-
Self-healing cutting mat (10-20$ depending on size)
-
Master Airbrush and a compressor (~ 110$ total)
-
Studio G’s GPaint lacquer paints (8 bottles for 70$)
- I watched many of his videos and was was sold on these paints which did not need to be mixed and ready for a RX-78-2’s default color scheme. They worked very well after I got used to my airbrush
-
MODO Lacquer thinner, syringe
-
A paint booth
- I made this myself with:
- 20′ x 20′ box fan (15$ in local supermarket)
- 20′ x 20′ x 1′ air filter from Home Depot – 5$
- Plastic storage bin with a square cut out the bottom – 10$
- I made this myself with:
-
- Hobby knife, blades
- Scribing knife/chisel
- Tweezers
-
Sanding sponges of varying grits
-
Rub n Buff for silver parts
-
Skewers and clips for painting
-
Disposables
- Cotton Buds
- Toothpicks
- Paint mixing cups
Even at the entry point of the hobby, customizing Gunpla demands a bit of investment—both in tools and the time and patience to learn how to use them. I had to get creative and make do with what I had early on, but eventually realized that getting some decent tools was a sound investment. It helped reduce friction and made the learning curve a lot less painful.
Next Steps
This build is far from perfect. I can still see every mistake when I look at it—but despite all that, I’m genuinely proud of how it turned out. More importantly, I’m excited. Excited to take everything I’ve learned and move on to new builds that have been stewing in my head for months, maybe years.
Over the past year while working on the RX-78-N (a name that changed several times—from RX-78-2 F-Type [way too long] to RX-78-F [a little too on-the-nose for a feminine design]), I also built a few other High Grade kits. I'm currently working on a Master Grade 1/100 P-Bandai Zaku High Mobility Type: Shin Matsunaga’s Custom and a MG 1/100 Gouf at the same time. The plan? To create a custom set—and I’m stoked to finally be working at a larger scale.
While I’ve taken photography classes before, I’m planning to dive into toy photography more seriously—through YouTube and Skillshare—to level up my shots, build out this portfolio, and better share the joy of the work I’ve been doing.
📷 Follow me on Instagram: @zeonzeoff for work-in-progress shots, finished builds, and more photos!
Until next time, thanks for visiting and reading.